Best friend photo frame DIY step by step tutorial

Hello everyone:)
It’s been a while since I have posted a tutorial, but I have found this wonderful best friend photo frame DIY step by step tutorial decorated so nicely which instantly threw me back into my childhood days when this would have been the perfect gift for a best friend. Actually it could be a great gift right now because we all need a dose of pink in our lives to satisfy our inner child. Am I right girls?;)
Since it’s not so difficult to make, this could also be a great project to do with your daughters.
Enough chit-chat! Let’s get started with our Best friend photo frame DIY step by step tutorial:)
To complete this fun project we need these materials:
– Polymer clay : white, fuchsia, beige, black, wasabi green, lilac.
– Tools: clay roller, clay slicer, clay knife, mini heart cutter.
– Other supplies: photo frame, toothpick, clay fast dry glue.
The flowers
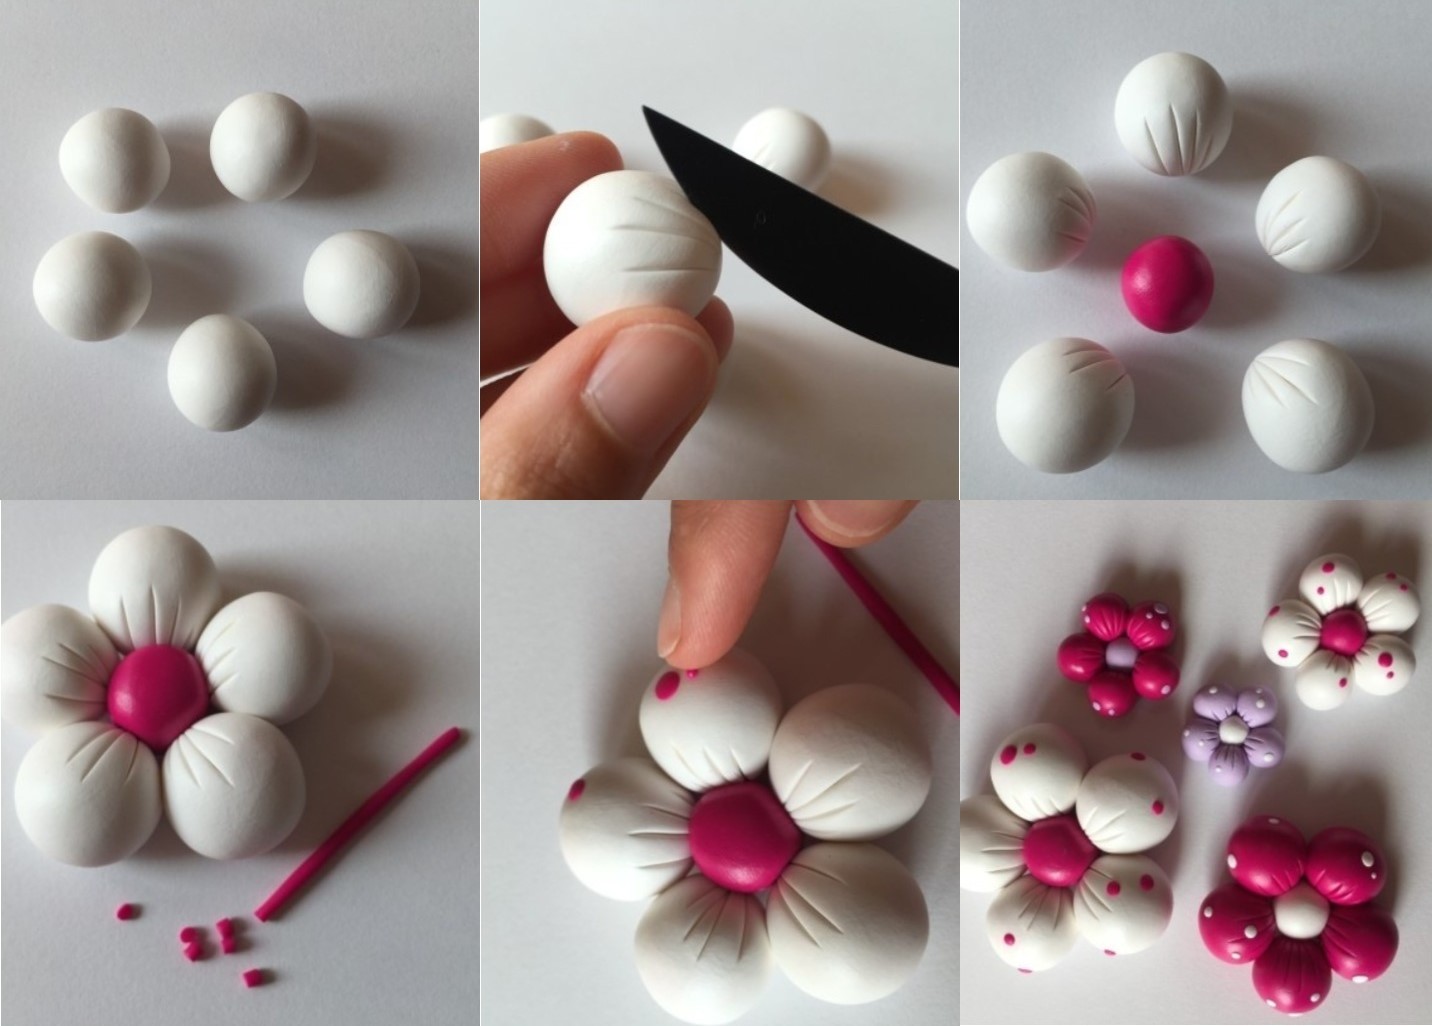
Divide the white clay it into 5 parts. Then roll each part to small spheres which will make the petals. The same way you will form the rest of the flowers with different colors and sizes.
The snail and the butterfly
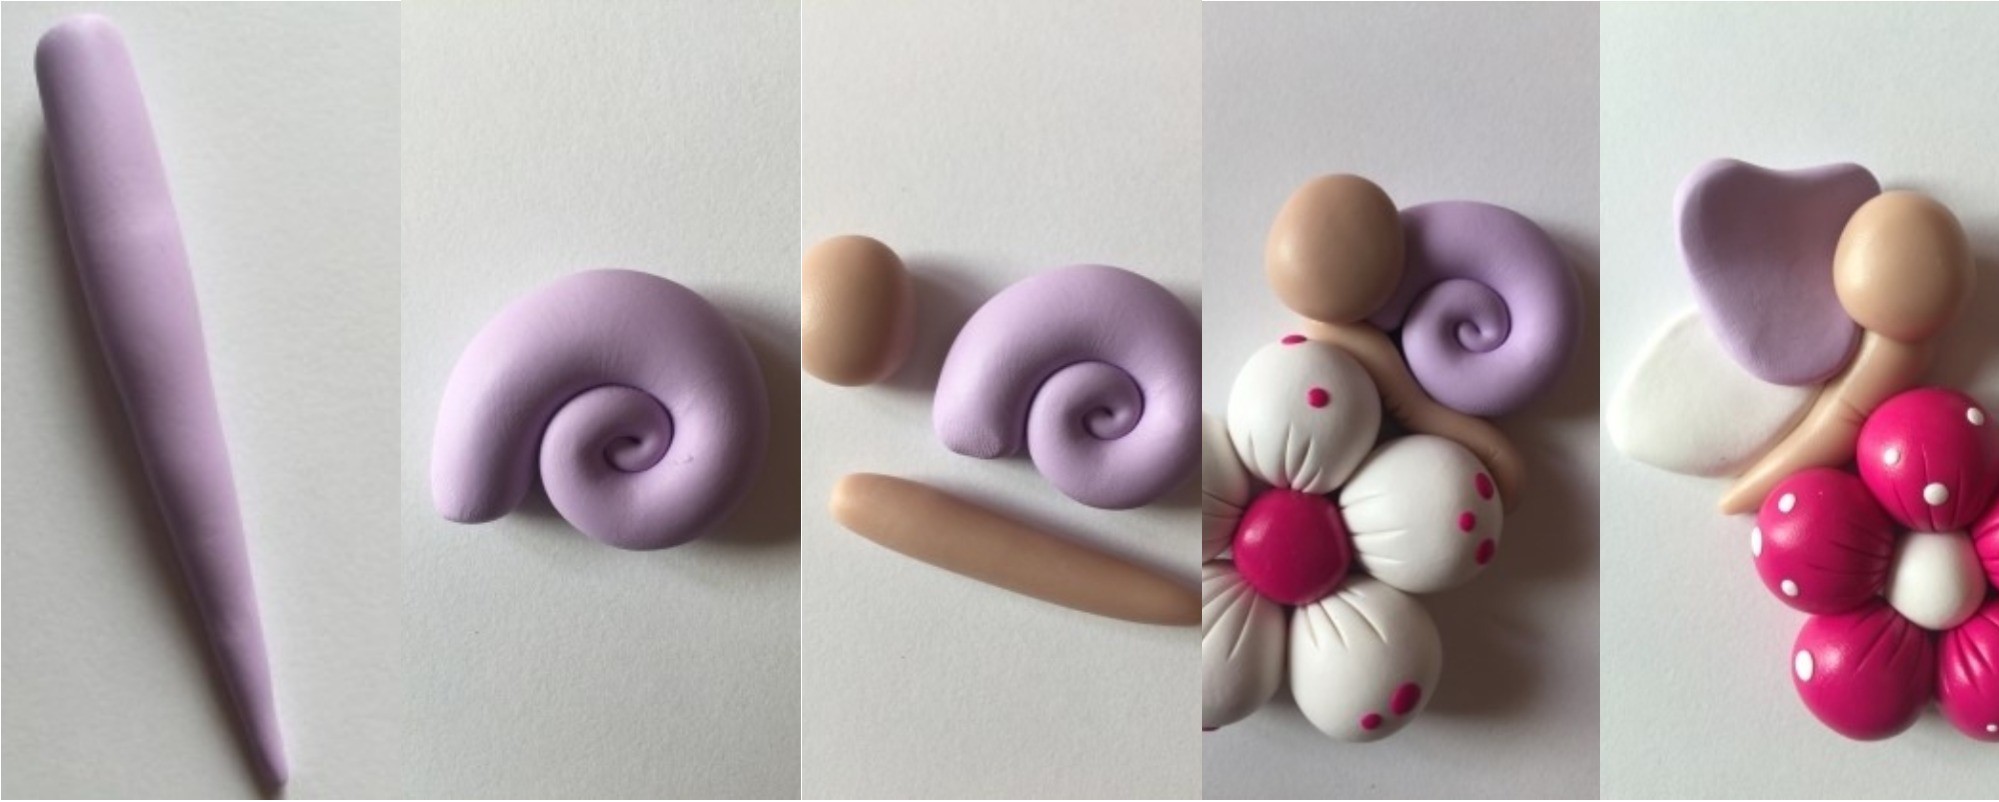
Now, for the snail shell use the lilac clay, shape it as a long cone and roll it.
For the head and body use beige clay. Make a flat oval shape out of white clay and a flat triangle out of lilac clay for the wings of the butterfly which has the same body and head as the snail. After assembling the parts together attach them to the large flowers.
The Details
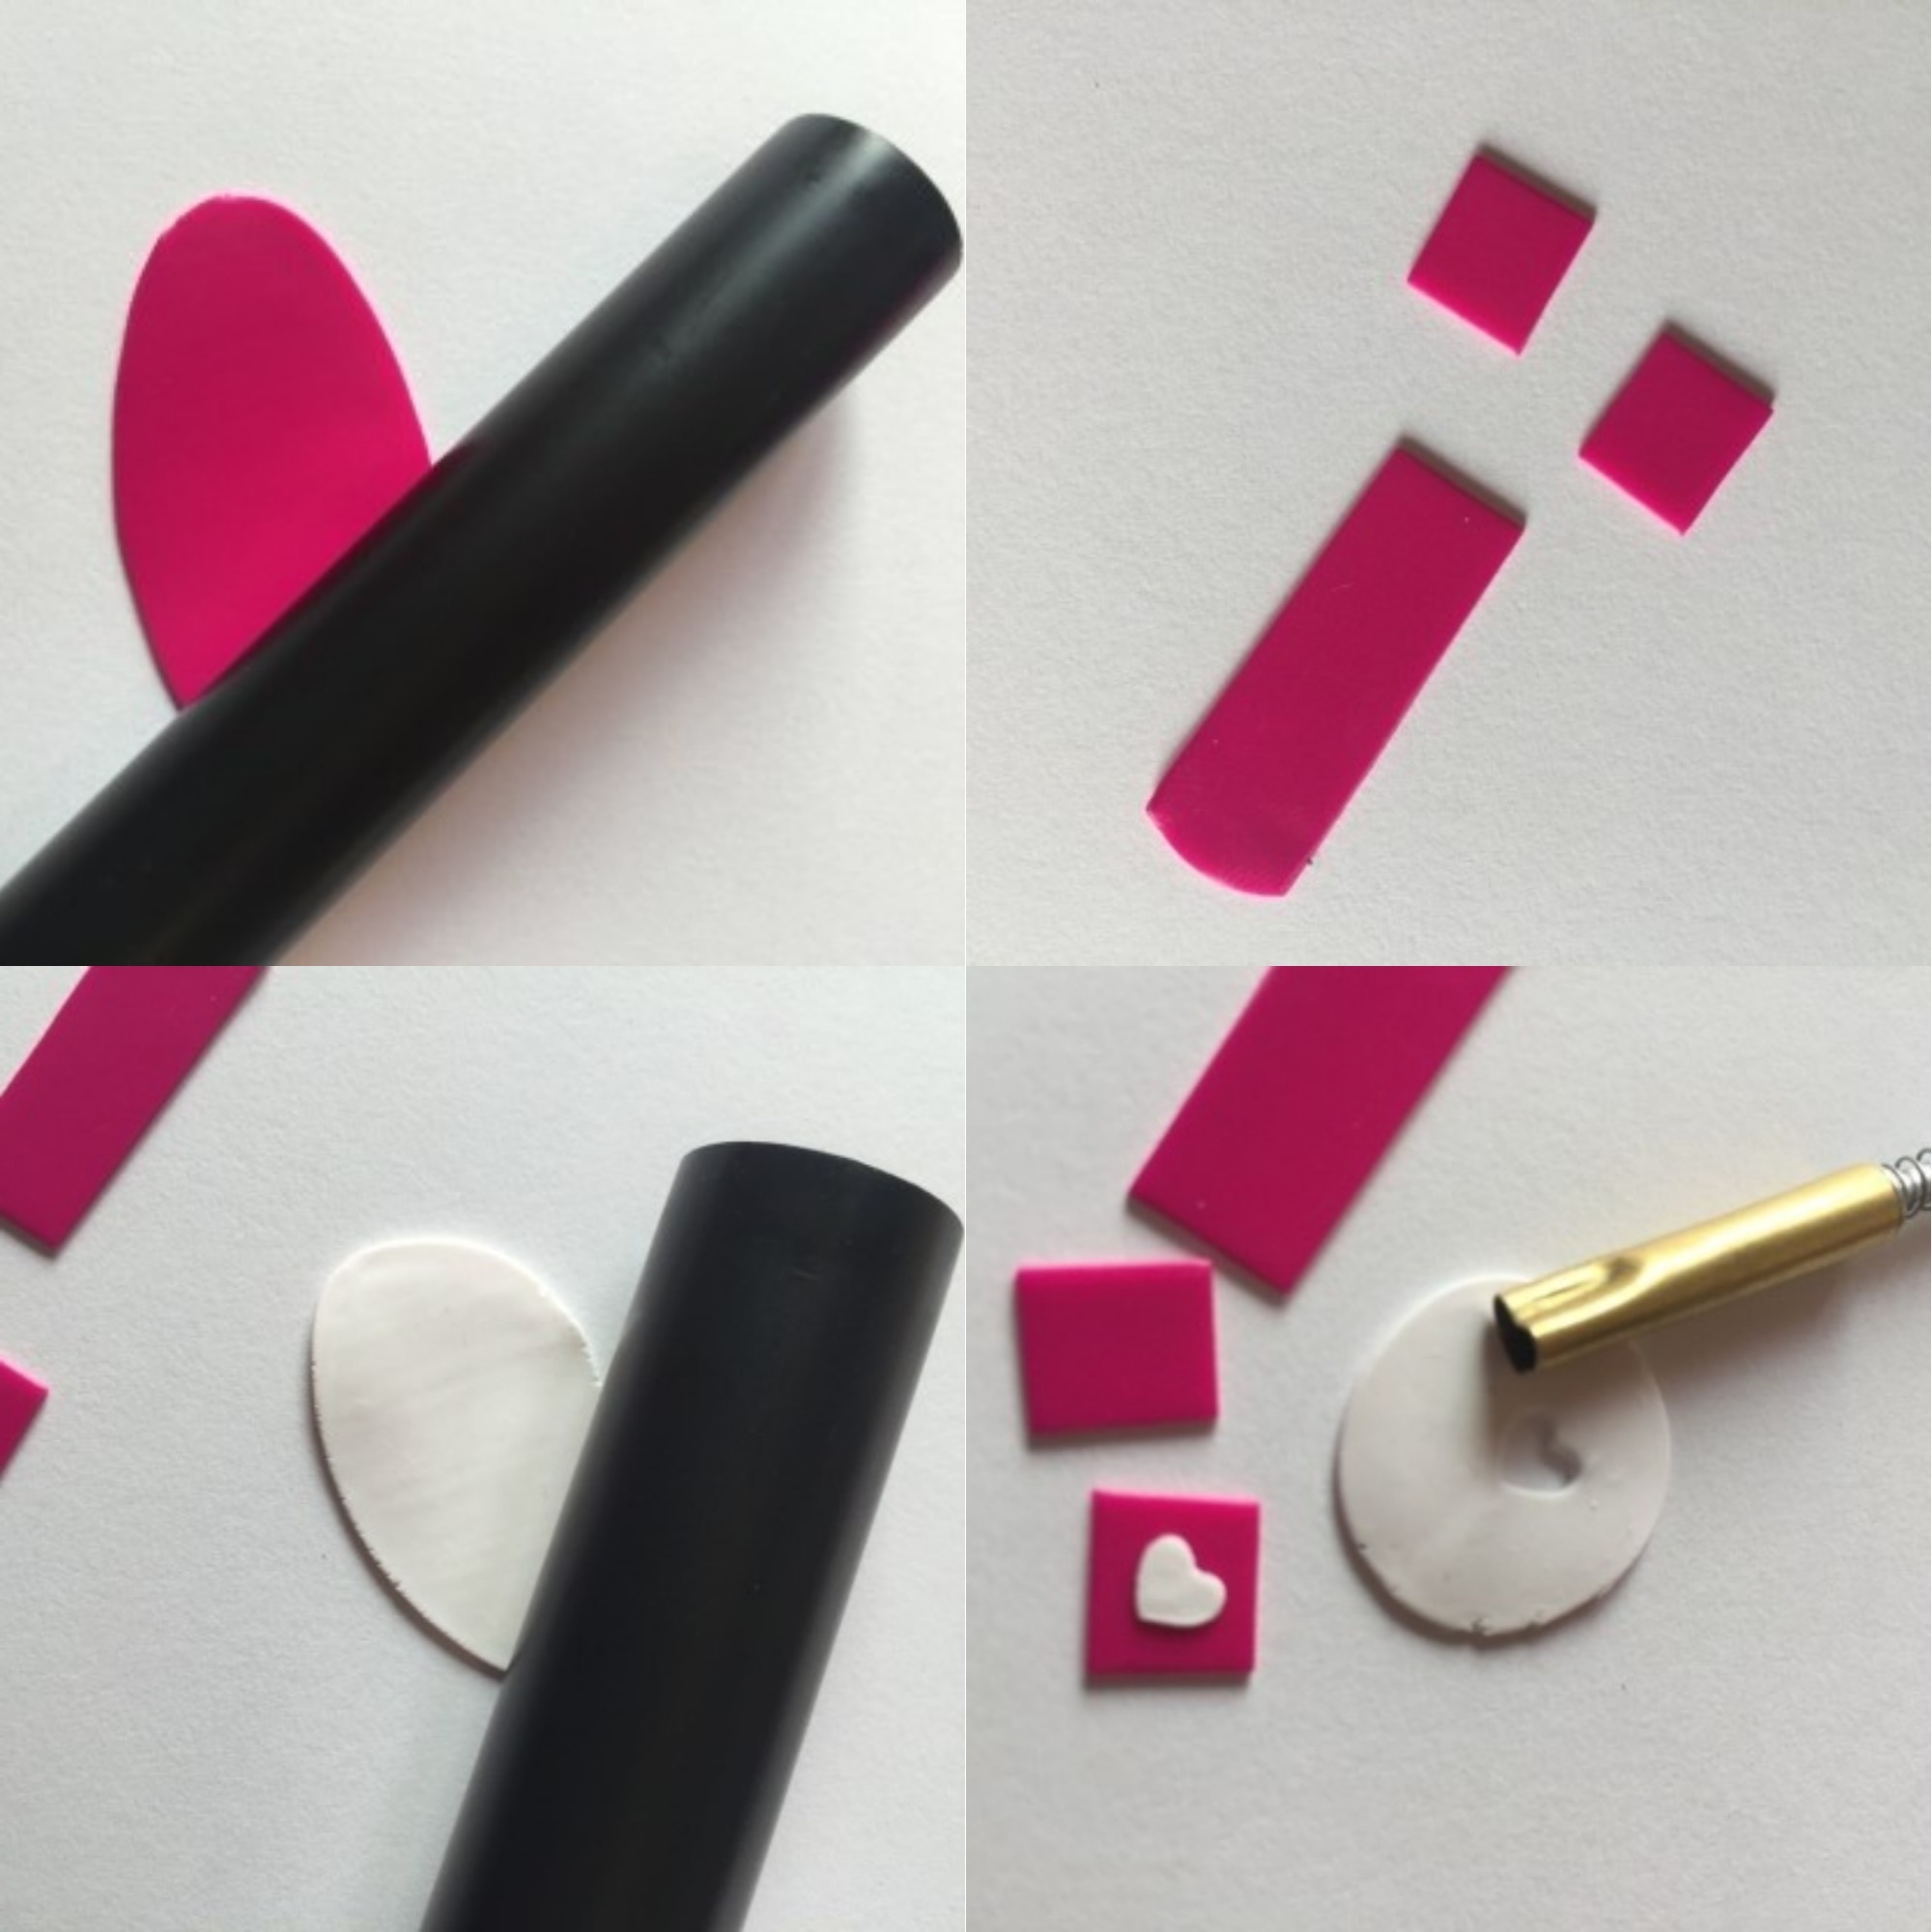
Use the roller to make a flat thin sheets from the fuchsia clay, then cut little squares. Do the same way with the white clay but this time just to cut little hearts that you will attach together on the snail shell and on the wings of the butterfly.
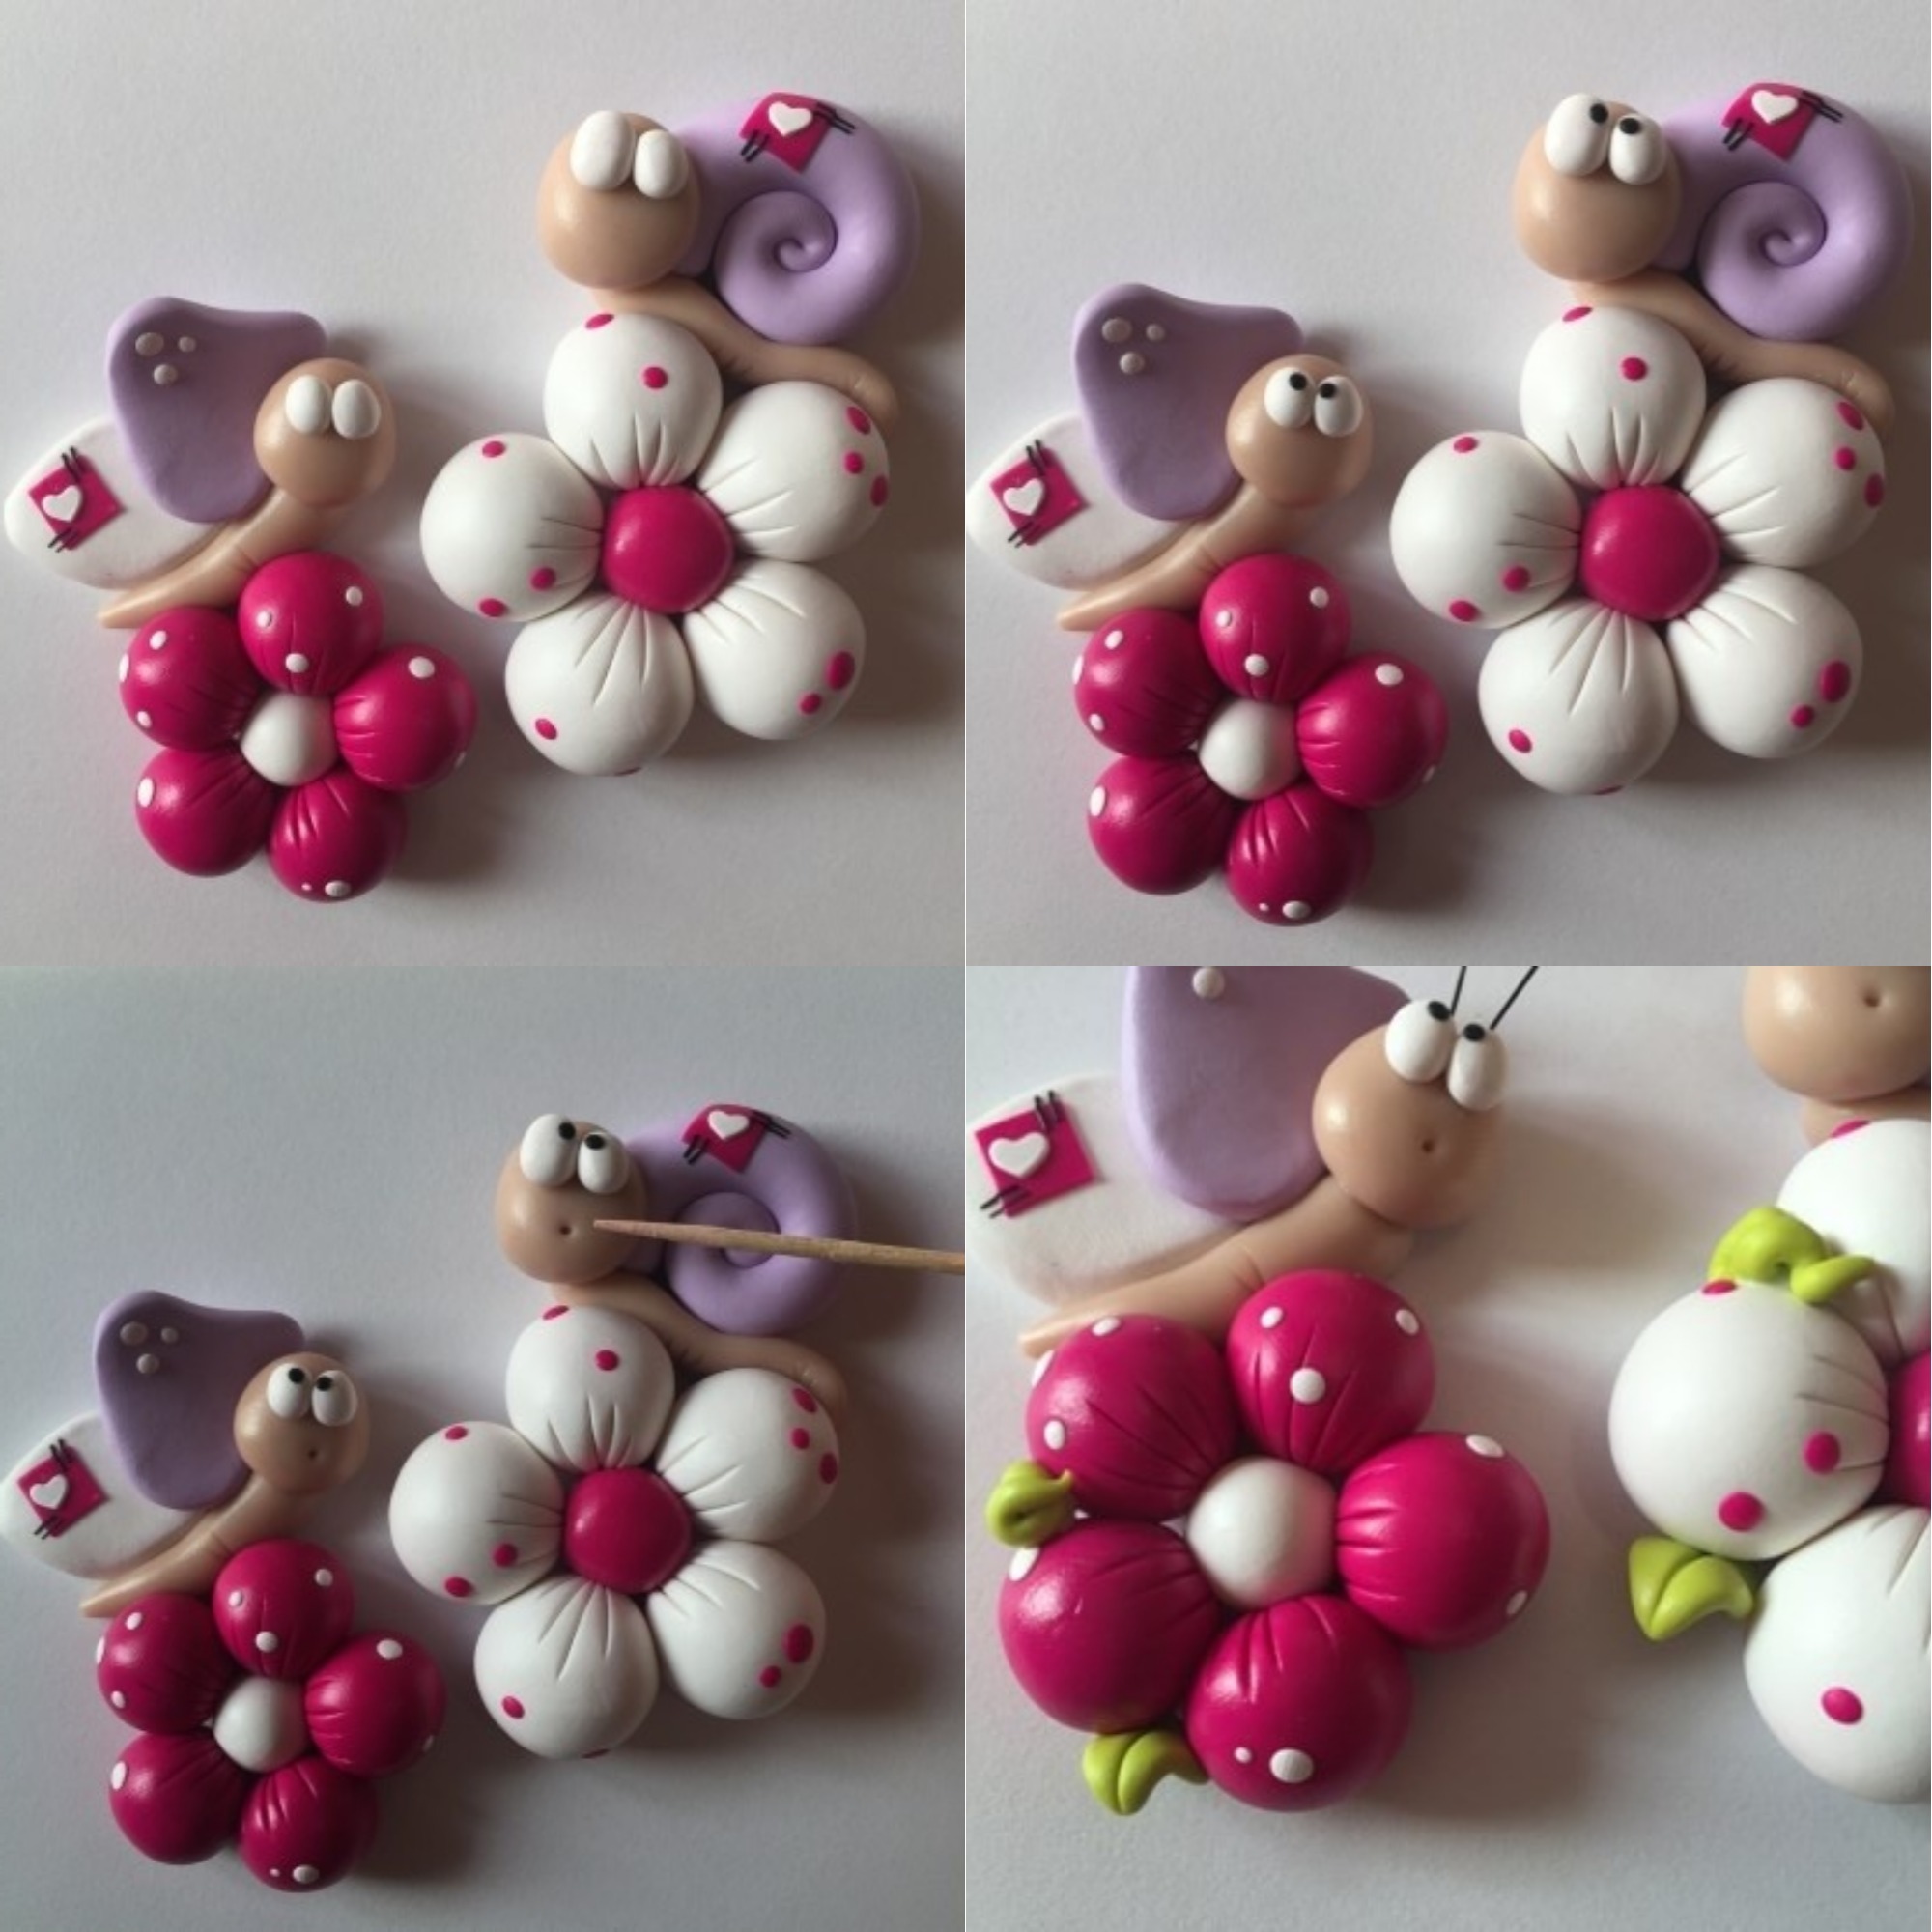
You can form the eyes from white and black balls and put them on the faces.
For the mouth use a toothpick and make a hole.
Use wasabi green clay to create little leaves and curls to apply on or between the petals.
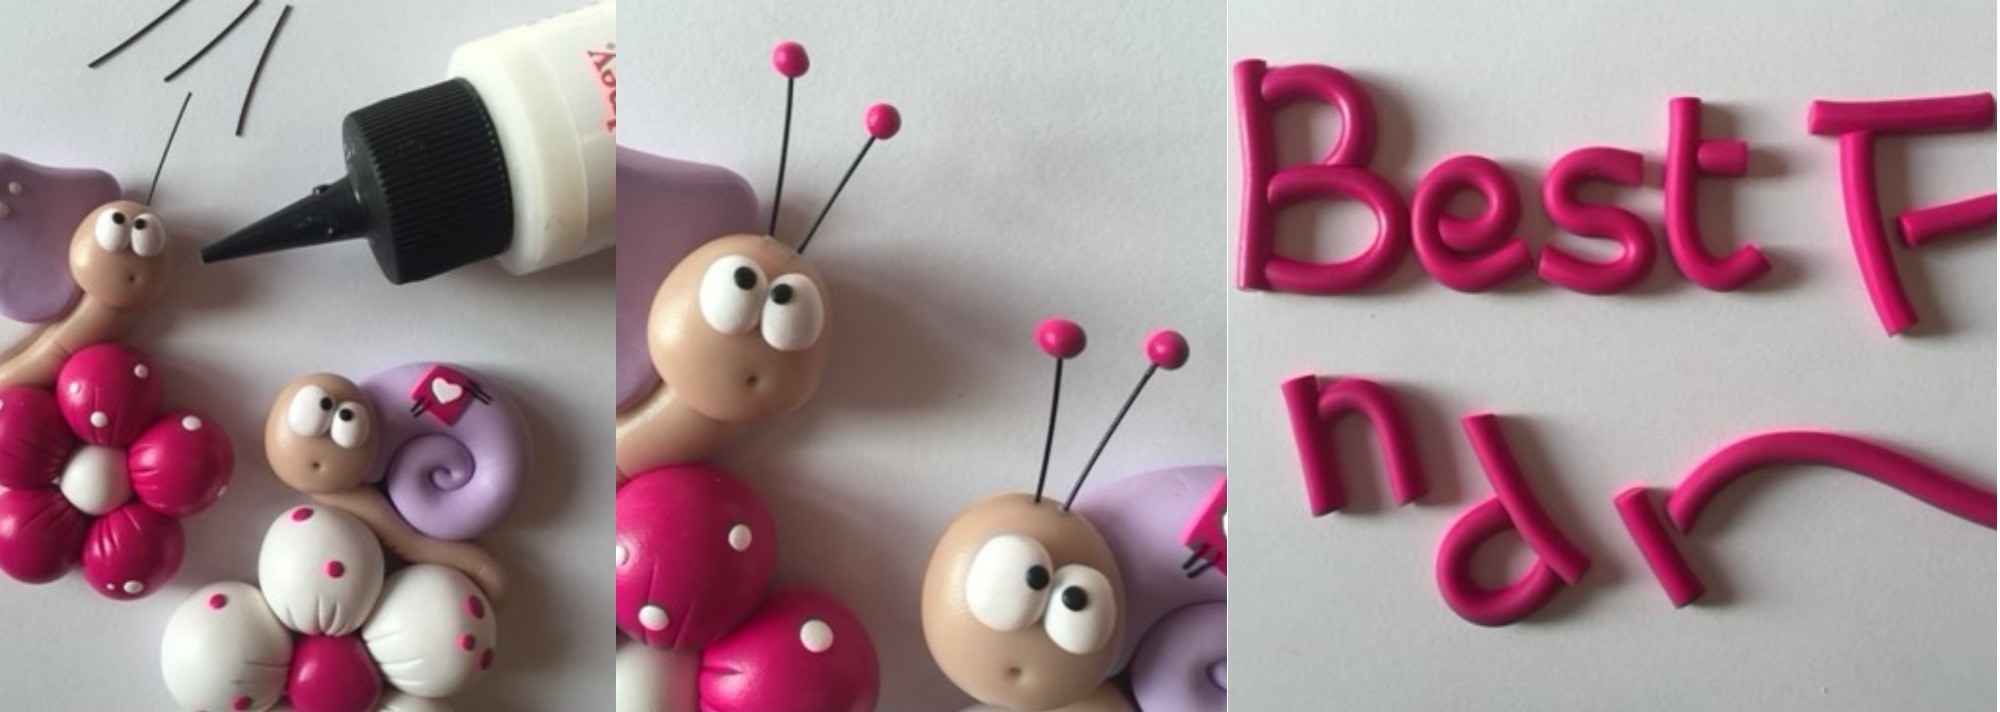
Use pieces of wire steel to create the feeler and fix them with bake & bond.
At the top of each feeler apply a fuchsia ball.
For the letters form a thin rope from fuchsia clay and cut the necessary pieces to join for the message.
At last, bake the pieces and use the clear fast dry glue to assemble the frame.
So this is the Best friend photo frame DIY step by step tutorial. Pretty awesome right? I have found this great tutorial here.
There are so many ways to decorate photo frames with polymer clay. All you need is good inspiration. You could easily find it in one of my older articles. Either you want to offer them as a gift or to use them for your own photos these are definitely a very unique and funny way to display them.
If you liked my Best friend photo frame DIY step by step tutorial please check and follow my Pinterest page where you can find so many other wonderful ideas.
######