
Today we’ll learn how to make a fimo tree. Hope you enjoy this polymer clay tree tutorial. It will help us on our next landscape projects.


We need some brown clay for the tree trunk and difference green and yellow clay for the leafs.
Let’s get started with our clay project 🙂
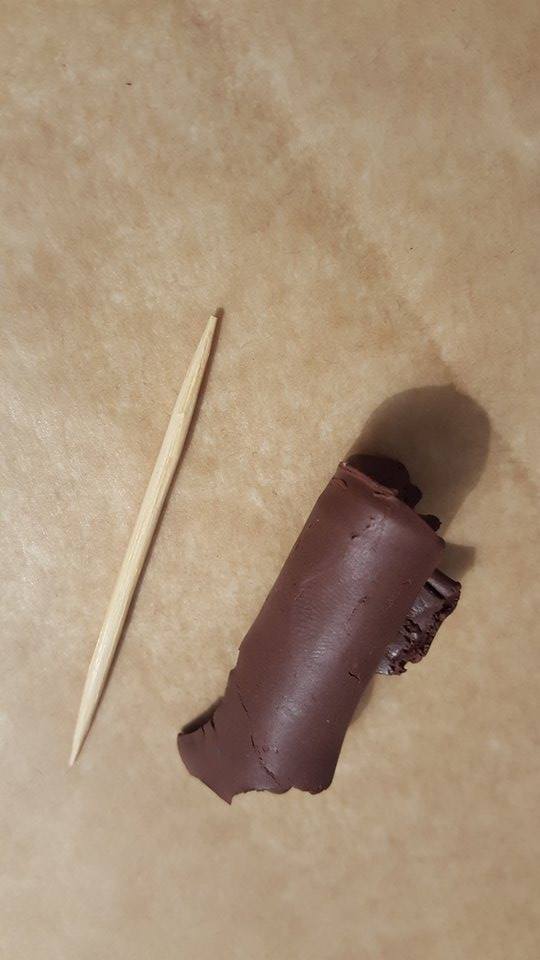
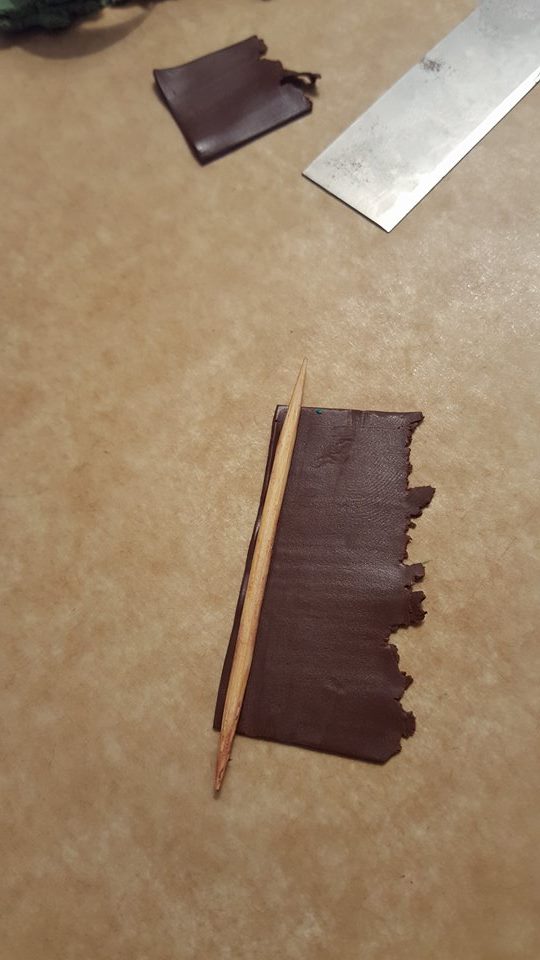
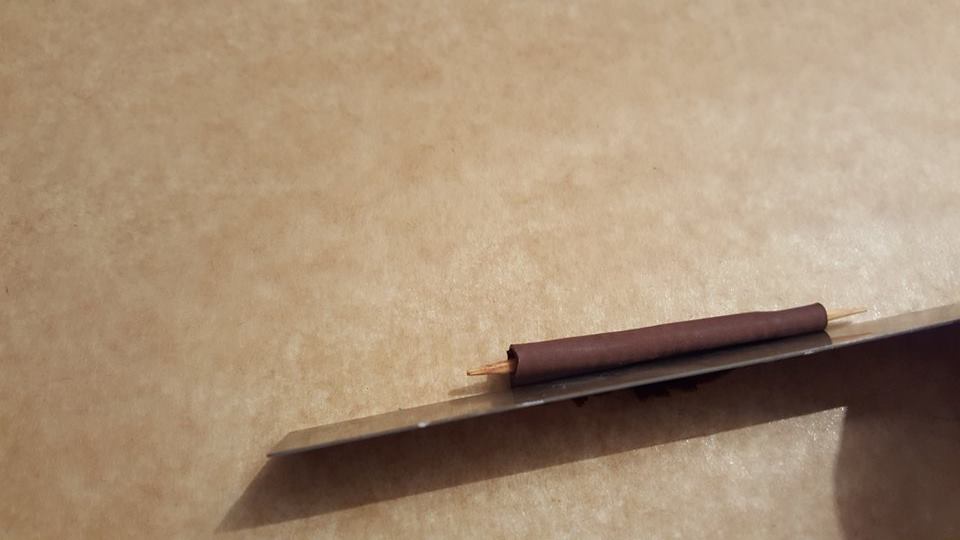
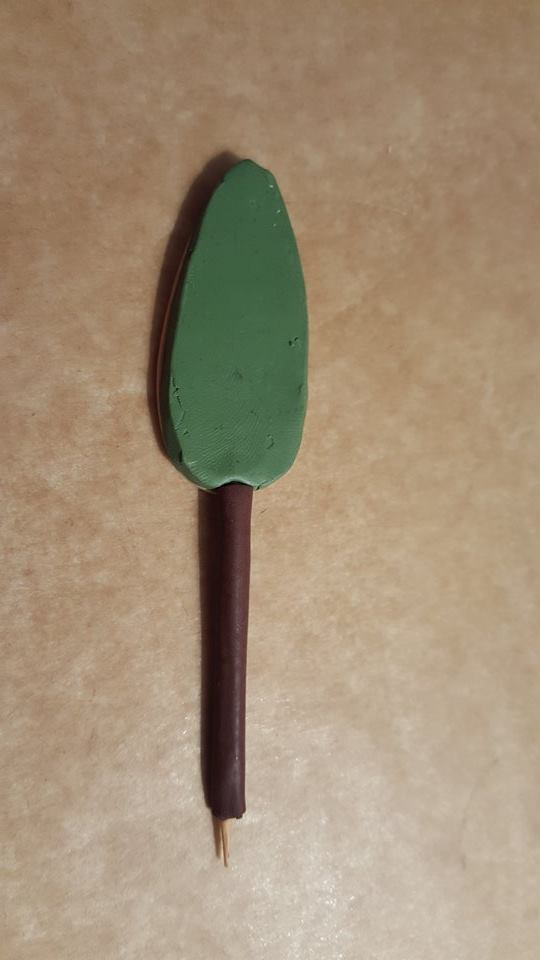
For the trunk we need a toothpick and the brown clay. We make a thin strip and we cover the toothpick. Please let the tips uncovered.

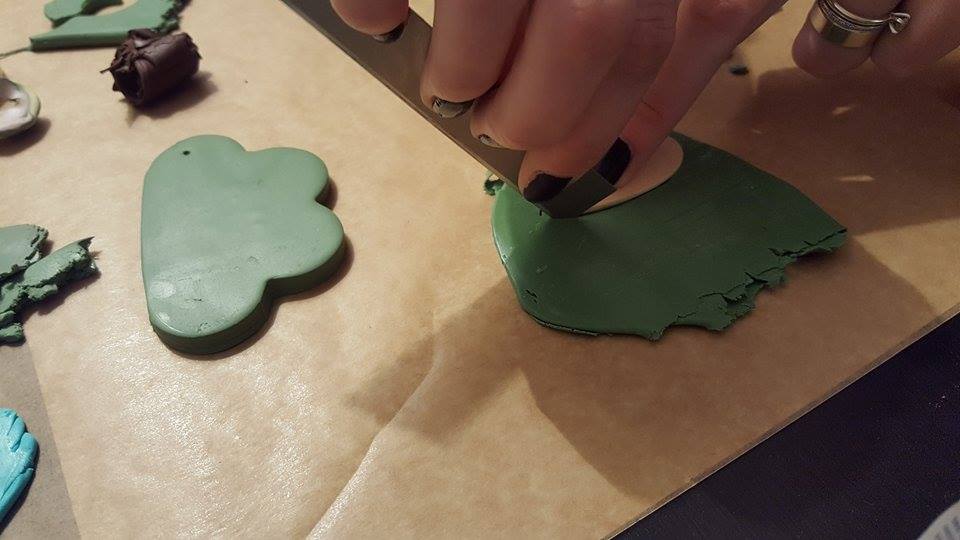
Make a green strip and cut on oval out of it. This clay piece will be the base for the leaves.
For the next step you’ll have to add it to the trunk. The tip of the toothpick will hep you do that 😉
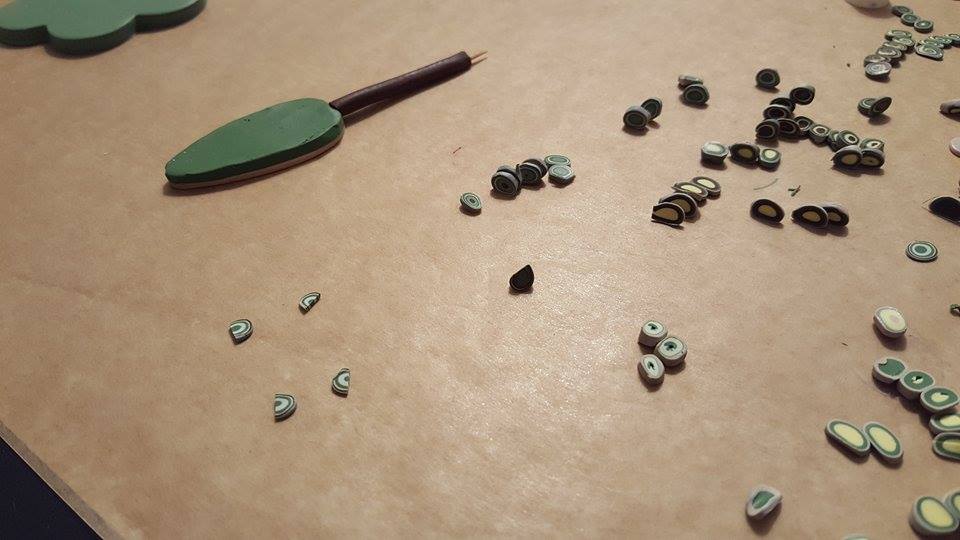
For the next step you’ll have to make tiny clay drops.
I used a clay extruder to combine green with yellow for autumn effect but you can use only green.
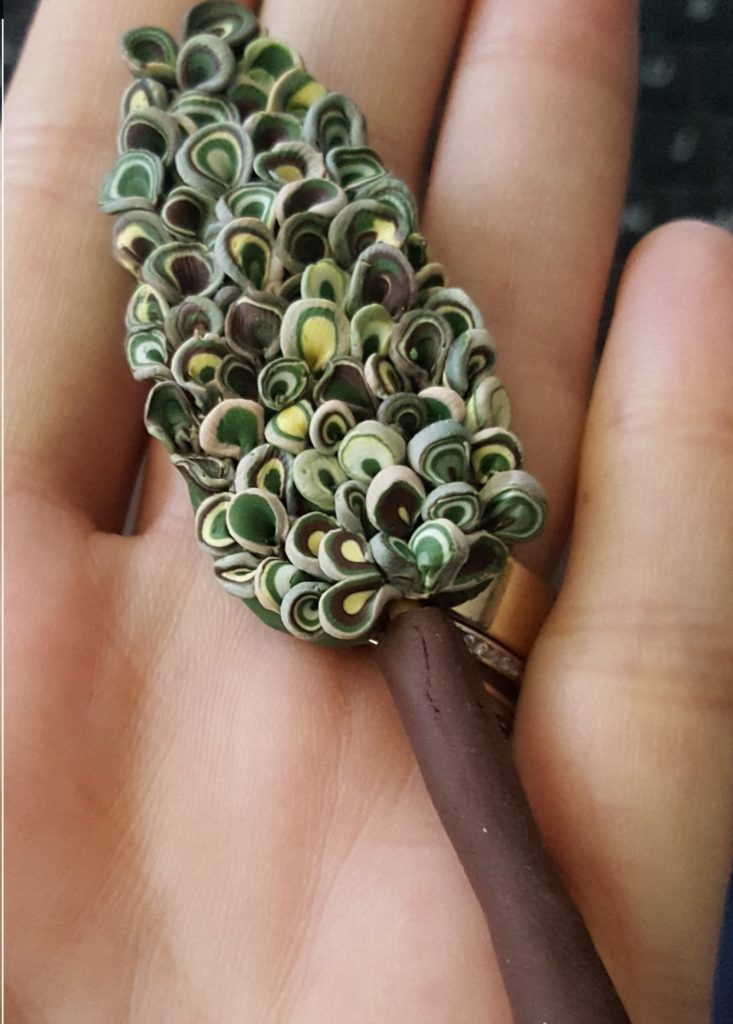
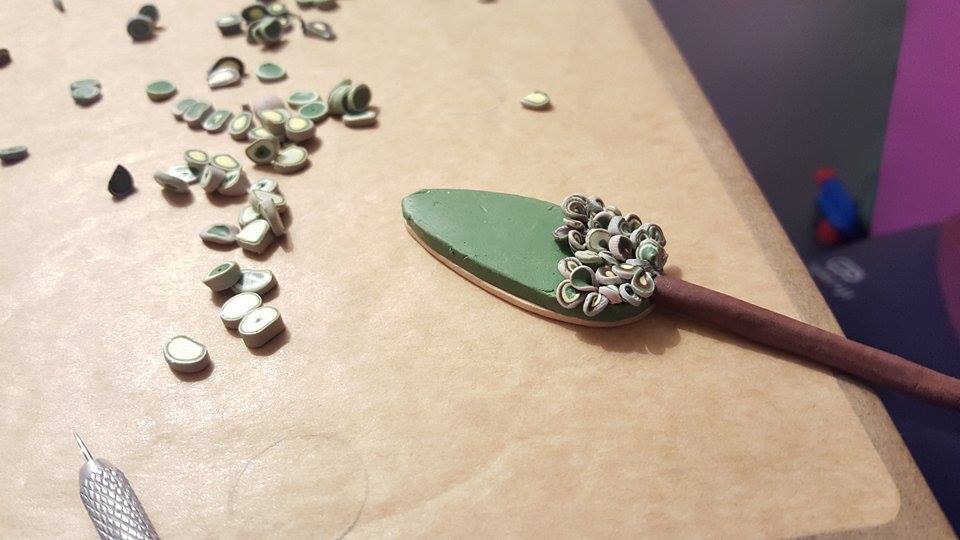
For the last step in this polymer clay tree tutorial you have to use a tool with sharp tip or a toothpick to add the leaves to the tree.
Congrats! This is your first fimo tree to use it with your later projects.
Click here to see mine: a Halloween landscape photo frame.
What do you think about this polymer clay tree tutorial? Will you try it?
See you later for more tutorials. You may consider following to follow my Pinterest page to get updates on free fimo diy tutorials..

######
