Polymer clay Piglet tutorial
“What day is it?” asked Pooh
“It’s today”, squeaked Piglet
“My favorite day”, said Pooh
Since I started this amazing project fimodiy, every day became a special one. There are so many nice things you can create that I feel like good mood will never end.
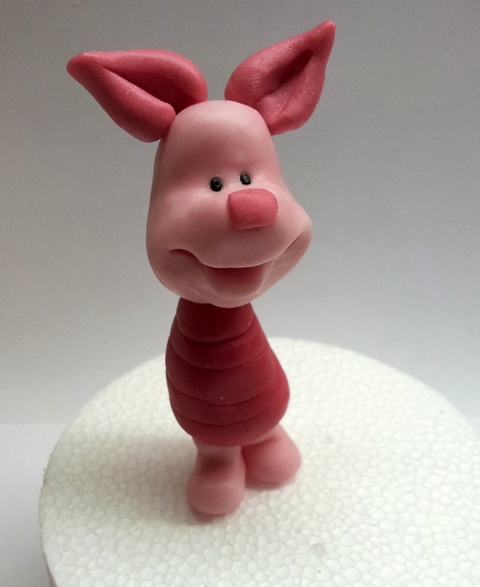
This article describes how to realize a polymer clay Piglet, the very nice friend of Winnie the Pooh .
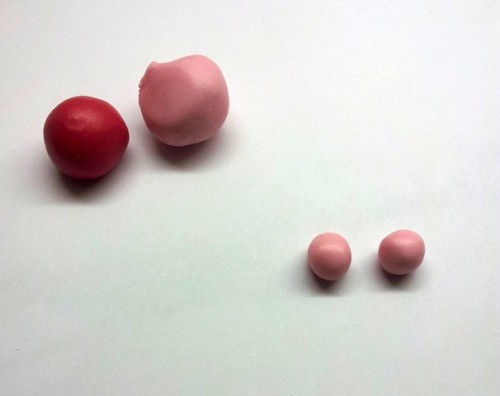
For this polymer clay Piglet tutorial you will need:
fuchsia , pink and black polymer clay
glue
cutter,
leaf tool,
ball tool
thin brush
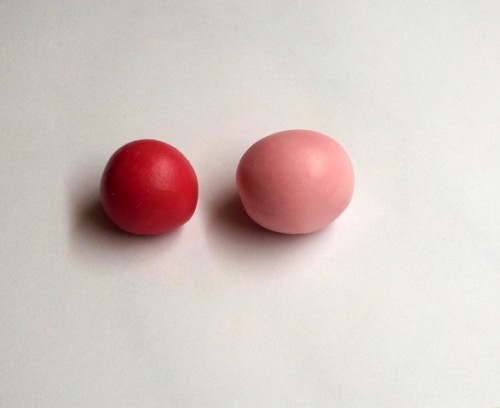
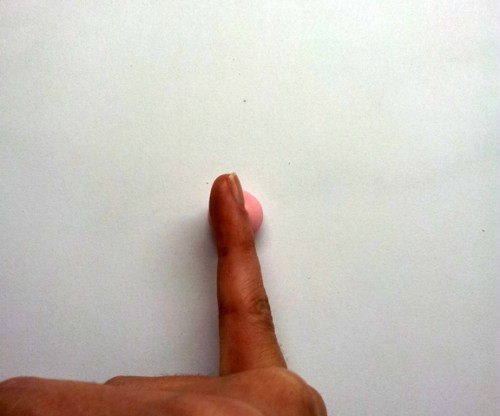
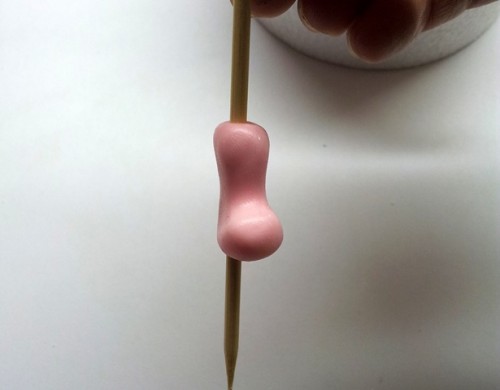
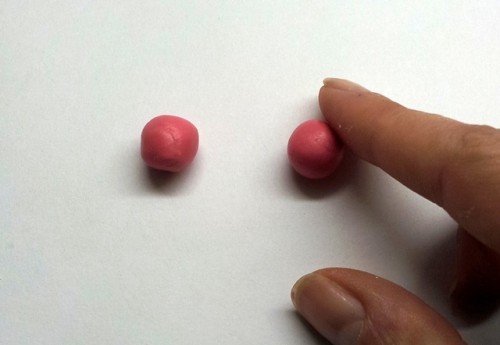
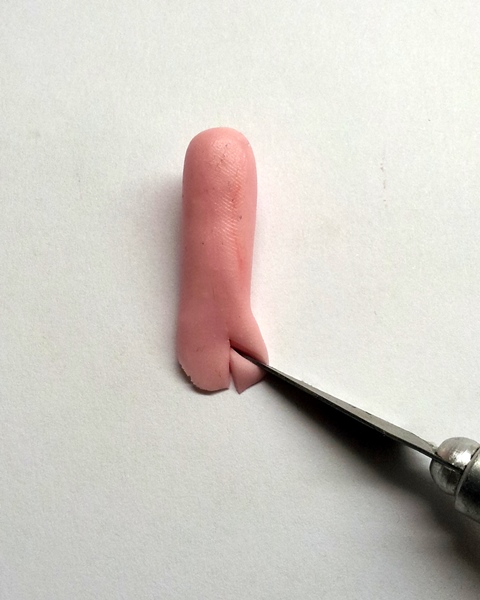
Take two pink balls and with the little finger or a tool make a groove on each one.
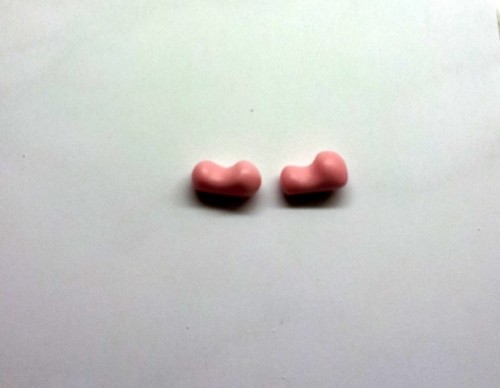
Round up the bottoms as shown in the picture. This will be the Piglet’s legs
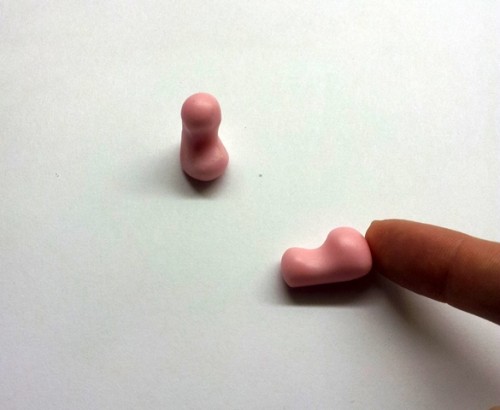
Stick a toothpick in one of the legs you create to sustain the body.
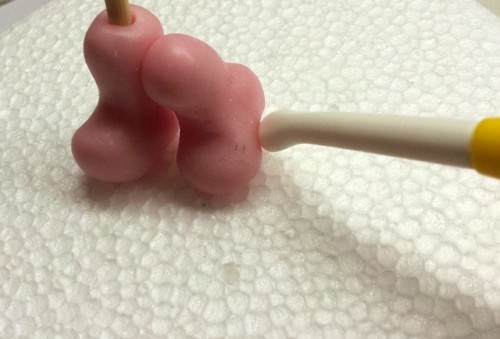
Place the other leg next to the one with the toothpick as shown in the picture
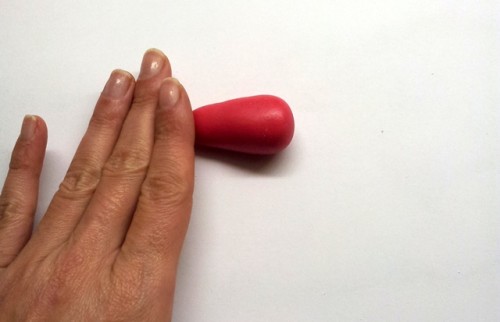
Take the fuchsia polymer clay and model a cone out of it. This will become the Piglet’s body.
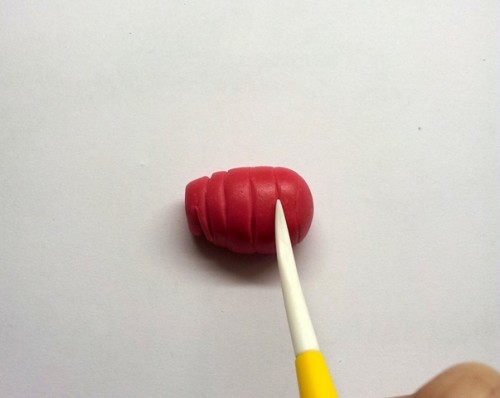
With the leaf tool create the lines on the body.
To to shape head you will need a piece of pink clay almost as big as the body. First of all create a boll out of it.
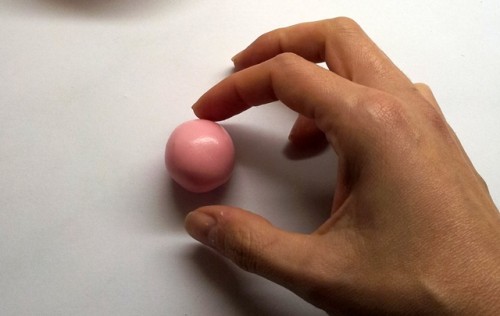
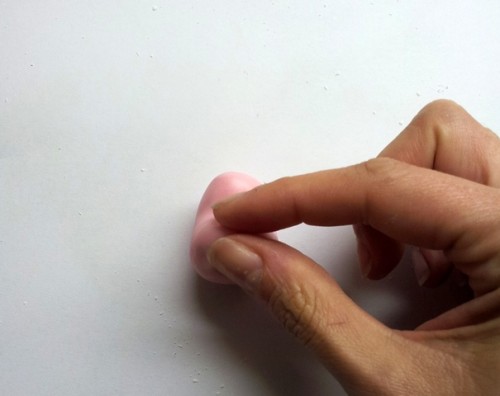
We pluck the nose with two fingers to create the projection of the nose
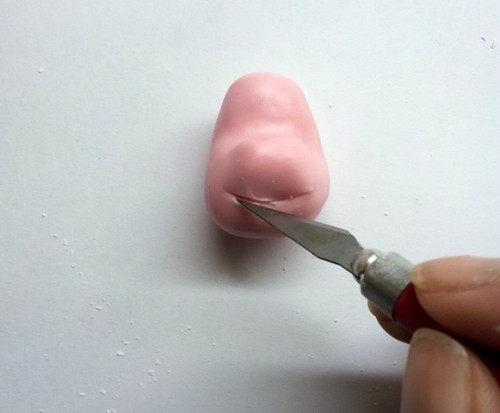
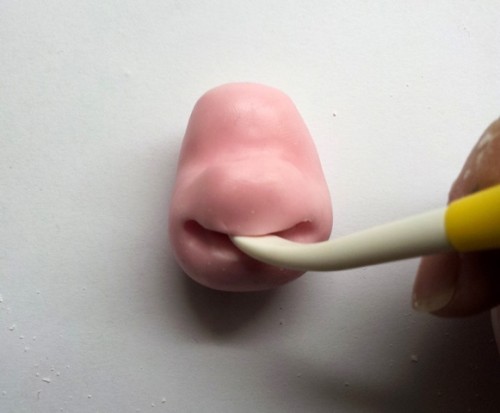
With cutter cut the width of the mouth
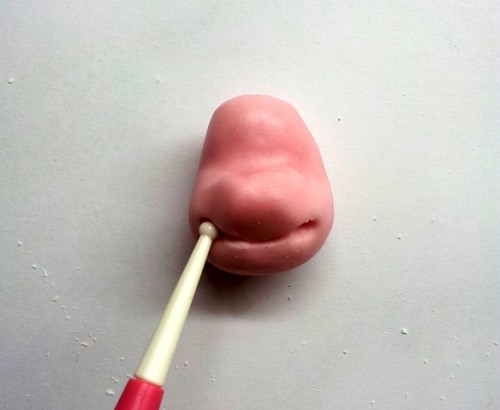
For this step you will need a ball tool to raise the corners of the mouth.
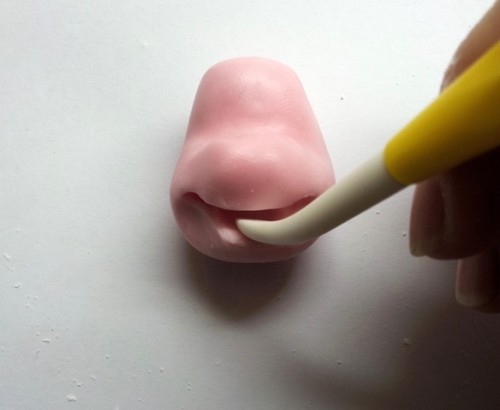
Pull out the upper lip with leaf tool.
With the same tool lower the bottom of the mouth.
Return to the ball tool to adjust the cheeks.
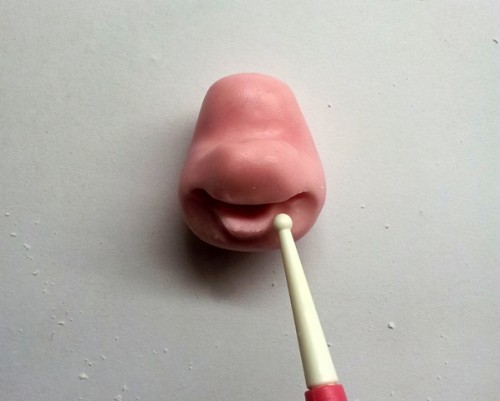
Engrave on the nose with a small ball tool two holes for the eyes.
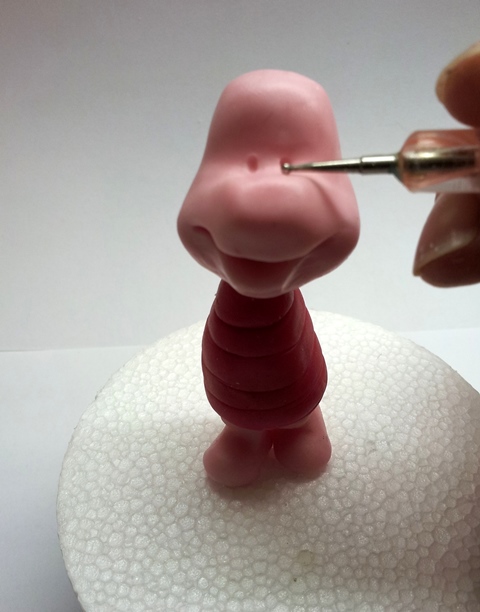
Shape into small balls of black polymer clay we’re going to put in two small holes for the eyes that you engraved on the nose.
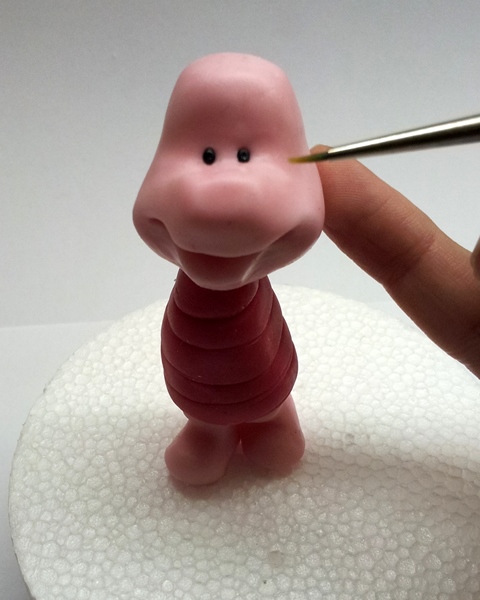
Combine 1 part of fuchsia polymer clay with 2 parts of pink polymer clay and forme a small sphere. Paste it on the nose and squash it a little bit.
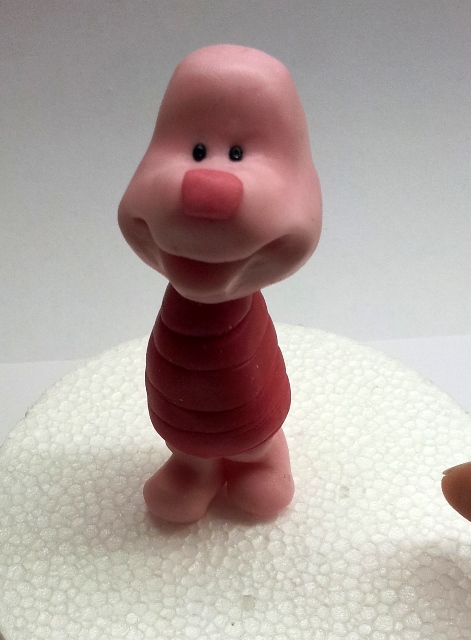
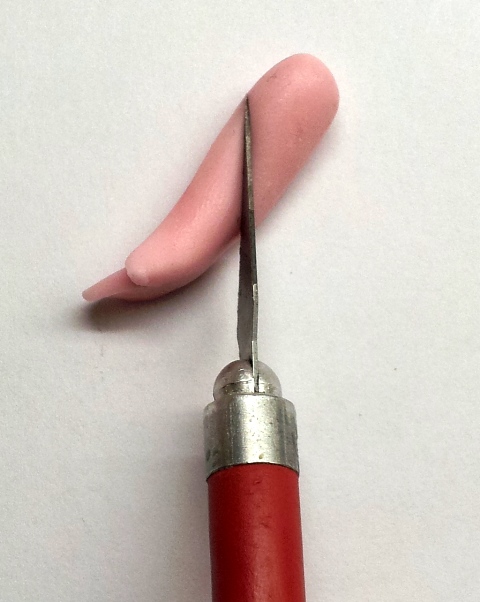
Form two small balls of fuchsia polymer clay.
Press them with the leaf tool to form the ears.

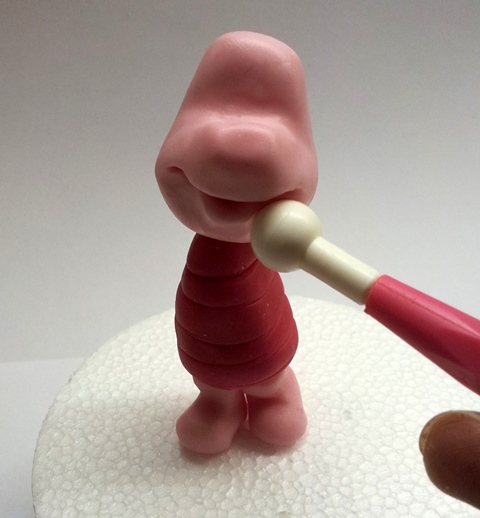
Apply the body on the toothpick, then the head and stick the ears.
As the last step in this polymer clay Piglet tutorial you have to shape the arms from two small cylinders with flattened end. Use a cutter to cut the hairline to the body and stick them to the body.
That’s the sweet and smiling Piglet ready to play with its friends!
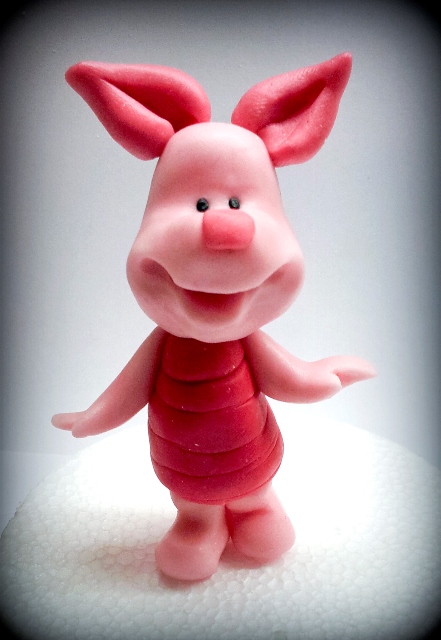
Use this step by step tutorial to achieve your soft Disney character. For more tutorials from this author (Alessandra Rainone) click here.
I hope you enjoyed this polymer clay Piglet tutorial and wish you all success and inspiration!
You may consider following to follow my Pinterest page to get updates on free fimo diy tutorials.
######