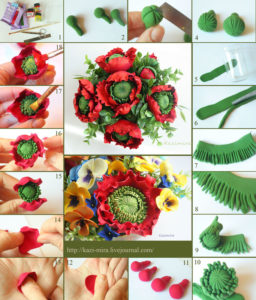
Polymer clay baby dragon tutorial
Today I will show you how to create a tiny black polymer clay baby dragon! I’ve found it suitable for Halloween decor or for your children’s room decor.
You can also teach your little ones how to make their own little black baby dragons, so that you will enjoy some quality time with them!
For this polymer clay baby dragon tutorial you will need:
-black, white and yellow polymer clay
-a cutter
-a ball-shaped modelling tool
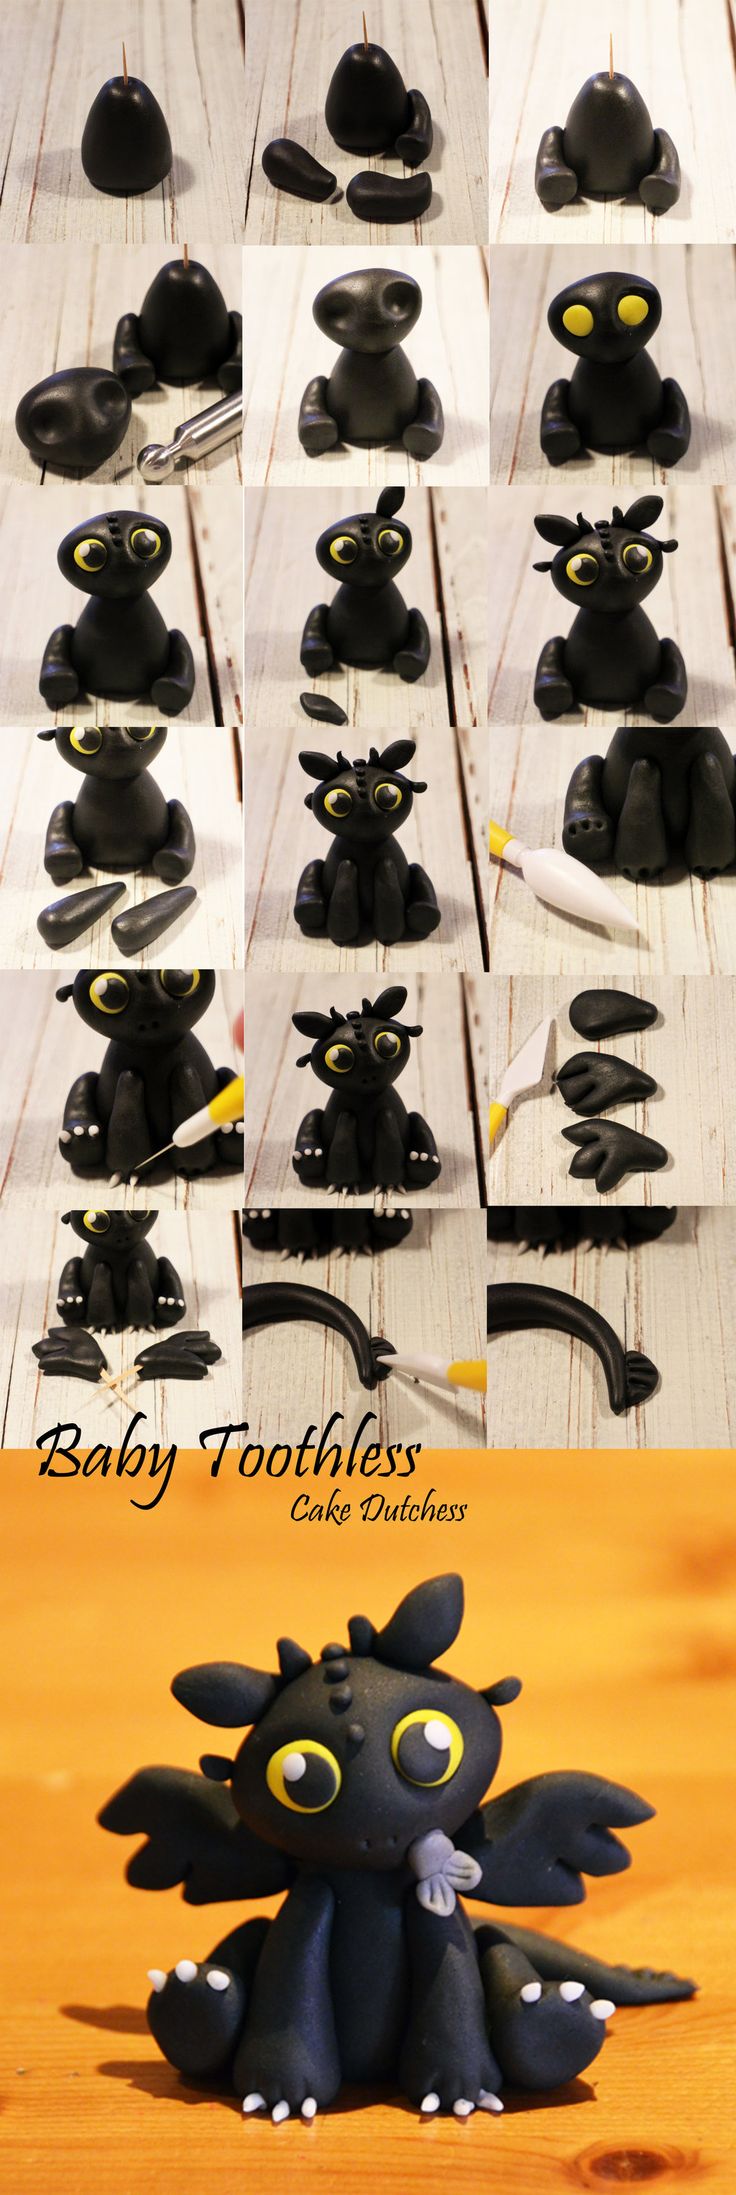
Step 1:
Shape the black polymer clay into an oval, but make sure that you make its base flat. This will be the dragon’s body.
Step 2:
Continue by shaping the dragon’s legs. You will need two black polymer clay tiny shapes, which you will stick to the body.
Then, you will sharpen them on the front side and after that, you will turn them into flat areas, so that you will be able to
place the polymer clay baby dragon’s paws onto them later.
Step 3:
Shape some black polymer clay into a flattened oval (just like in the collage). Use the ball-shaped modelling tool to create
two tiny holes into the oval. Use the yellow polymer clay to make two little flattened balls, which you will place into the holes.
Then, create even tinier black flattened balls, which you will add onto the yellow ones. In order to create a more realistic effect, add
some white polymer clay on the top of the black balls. These will be the polymer clay dragon’s eyes.
Step 4:
You will now need to shape two tiny rounded diamonds, using the black polymer clay. Also, cut some thin strips that you will add onto
the dragon’s head. This is how you create its ears and also a realistic effect for its fur.
Step 5:
Shape two thin triangles from the black polymer clay. Add them on the front side of the dragon’s body. These will represent its tiny arms.
Step 6:
Shape the baby dragon’s paws! You will need four of them. Make sure to use really tiny pieces of the white polymer clay in order to create
the baby dragon’s little claws. Add them onto the paws. (Check the collage for a more specific view!)
Step 7:
Make it fly! Use the black polymer clay to shape two wings for your cute baby dragon. Use the cutter give them a proper look.
Step 8:
Last but not least, the tail. Create a black polymer clay long strip and add a semi-oval piece of polymer clay on its end.
If you feel inspired, accesorize your dragon baby with a scarf or a bow, using colourful polymer clay. It is easy to make and it will definitely
give your house a spooky atmosphere for Haloween!
I’ve found my inspiration here
Feel free to find more tutorials like this one on my Pinterest page !
######