Polymer clay decorative jewelry dish – tutorial

If you find it nice to create your own jewelry, I bet you would love to create your own storage space for them? This polymer clay decorative jewelry dish tutorial certainly will meet your needs! And it looks incredibly well!
Things you need:
– 4 colors of polymer clay (in this tutorial I used red, black, white and grey)
– small round shape cutter
– cutter
– rolling pin
– clay extruder
– a jar, a glass or a can (You can use any shape. At the end of this tutorial you can find photos of polymer clay decorative dish in a variety of shapes and colors)
Method:
Step 1:
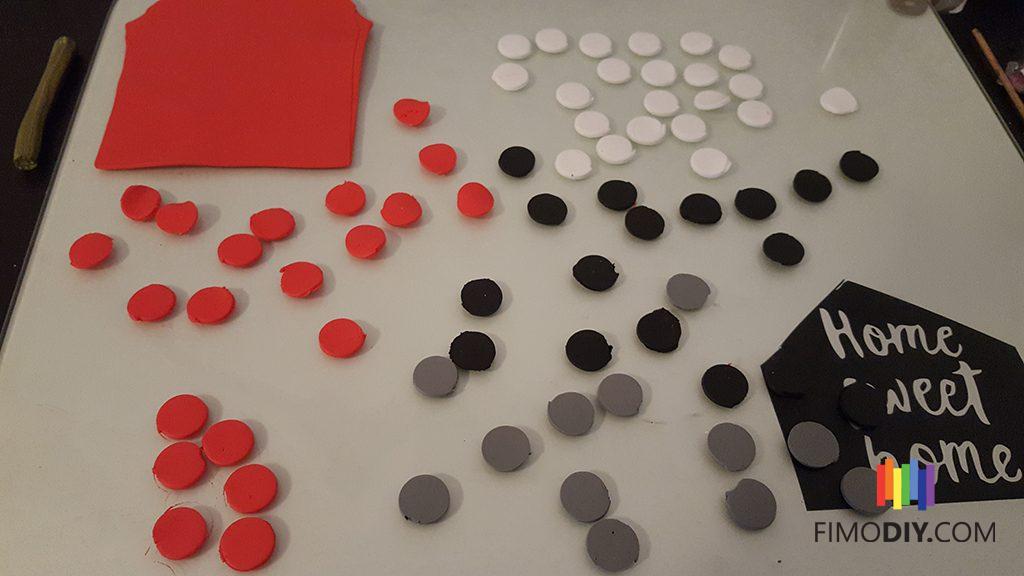
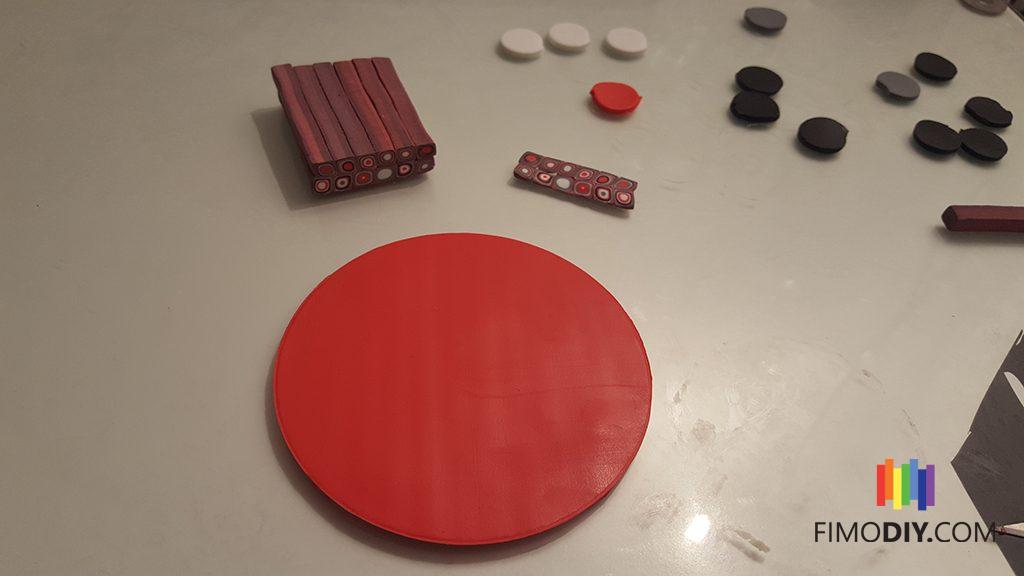
Make one thin sheet of every color of polymer clay and cut small circles of every color as shown in the photo below.
Step 2:
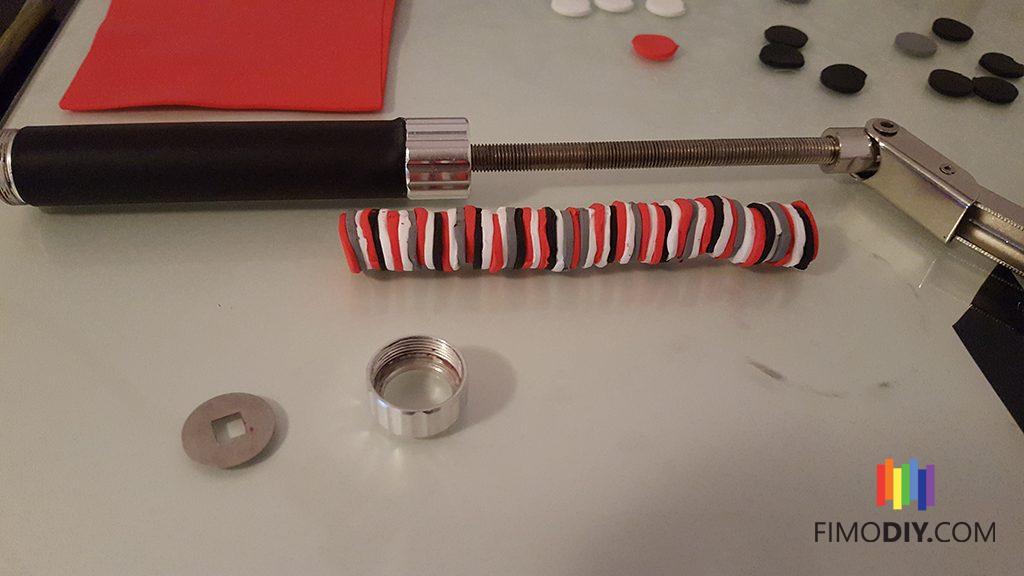
Combine the colored dots as desired. I added a photo with the combination I created for the beginners or for the ones that love the example I created and just want one polymer clay decorative jewelry dish just like the one I created for this tutorial.
Step 3:
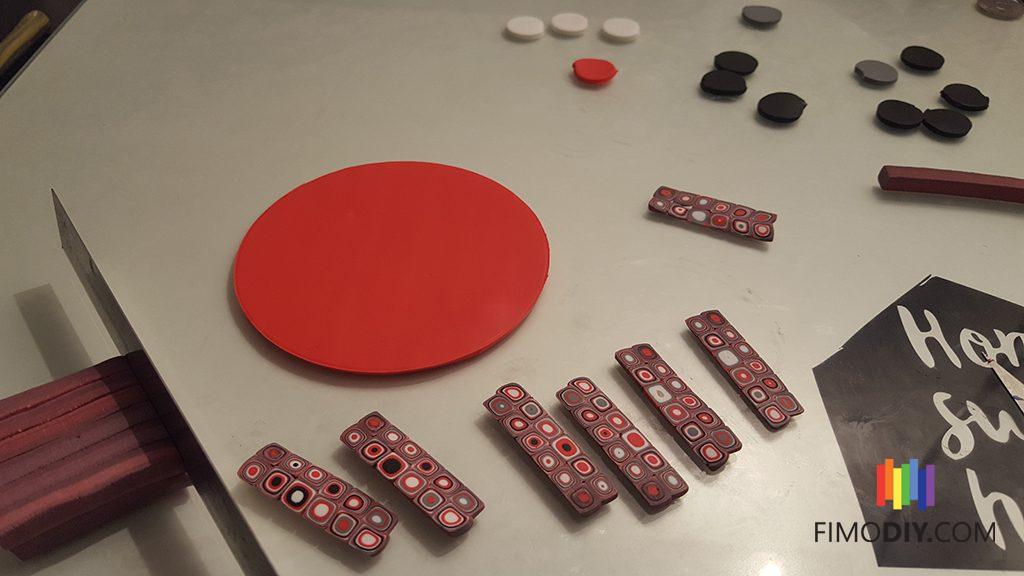
Take the big roll you created the previous step and pass it through the extruder. I used a square mold in the end of the extruder. You’ll obtain a thin square grid as the one in the photo below.
Step 4:
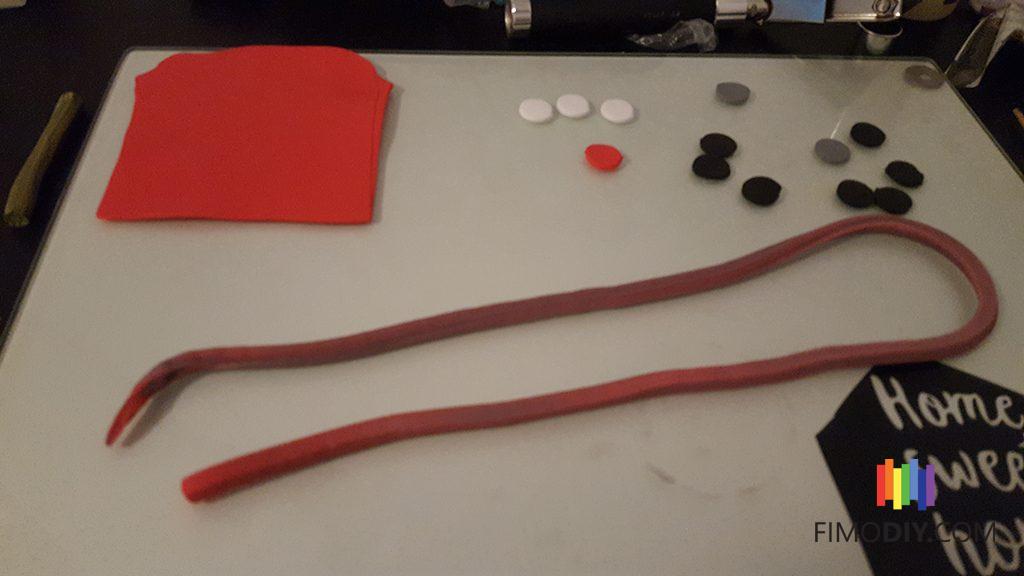
Cut the thin square grid into equal pieces and combine them as shown below. It is a easy step because at the previous step you used a square mold. Cut a thin piece from one end of the rectangle just formed to have a perfect ending of the rolls.
Step 5:
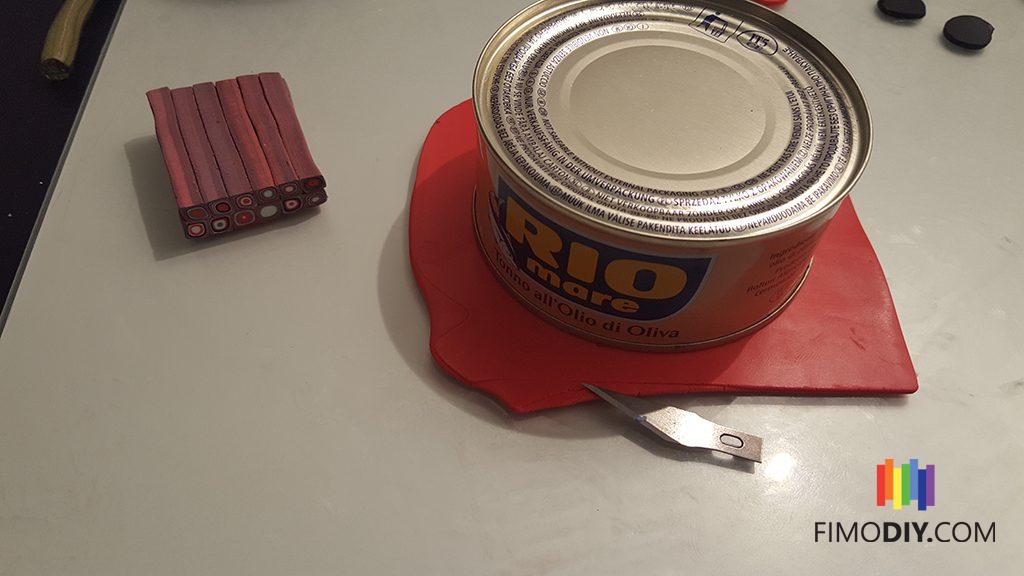
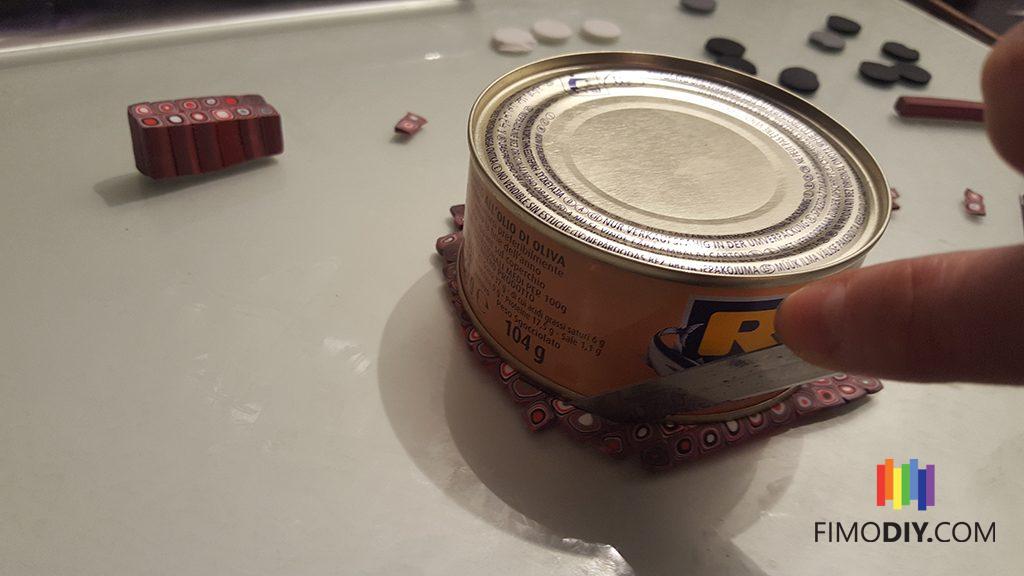
Make a thin sheet of polymer clay. We will use this as the base of our polymer clay decorative jewelry dish. You can use any color of your choice, I used red fimo. Depending on the size you want to create, use a mold or a object from your house to create the perfect shape. I used a tin can and cut out the excess of the clay. This way I created a better usage for the cane I created before. For a better understanding I added photos.
Step 6:
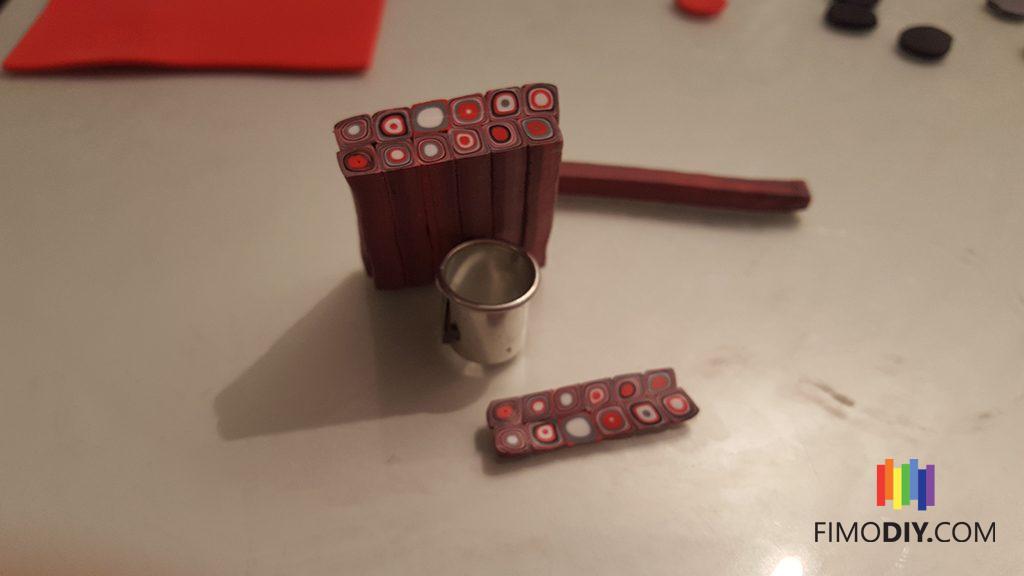
Take the cane and cut thin slices out of it. Cover the red polymer clay base with this slices.

Step 7:
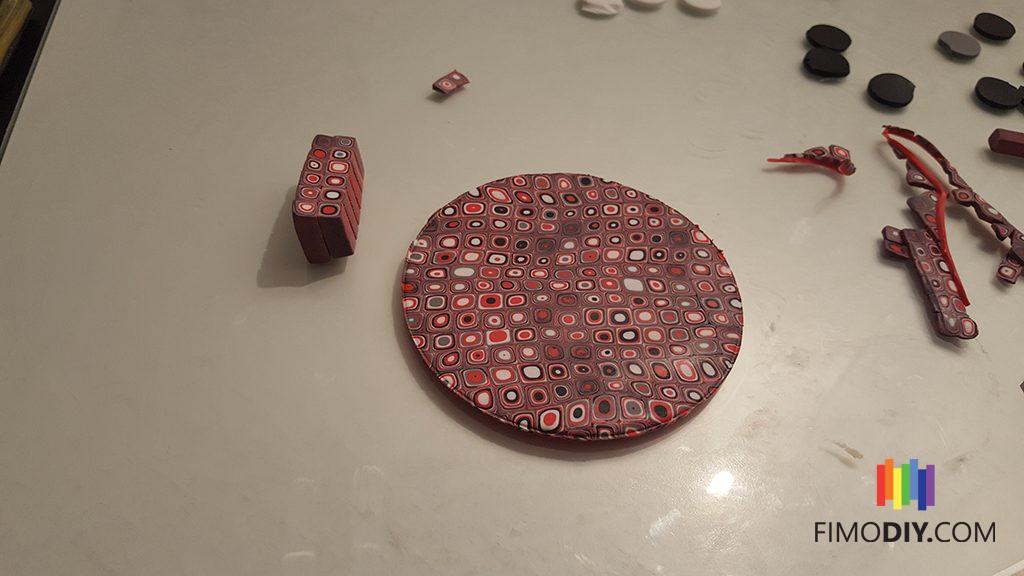
Use a rolling pin to unify the base. Reuse the mold or the object you chosen before and cut the extra clay.
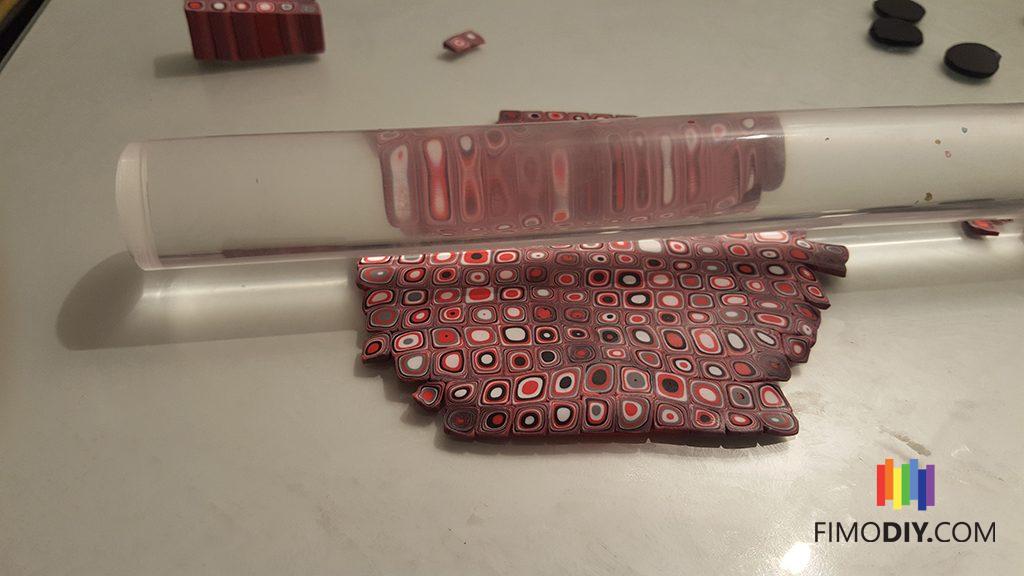
Look I have a perfect circle with a very nice pattern!
Step 8:
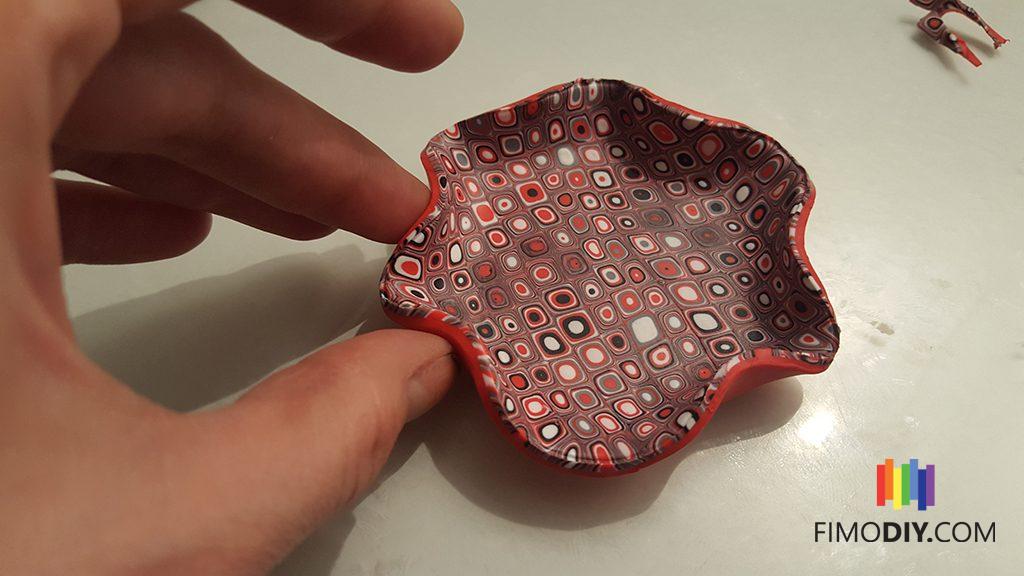
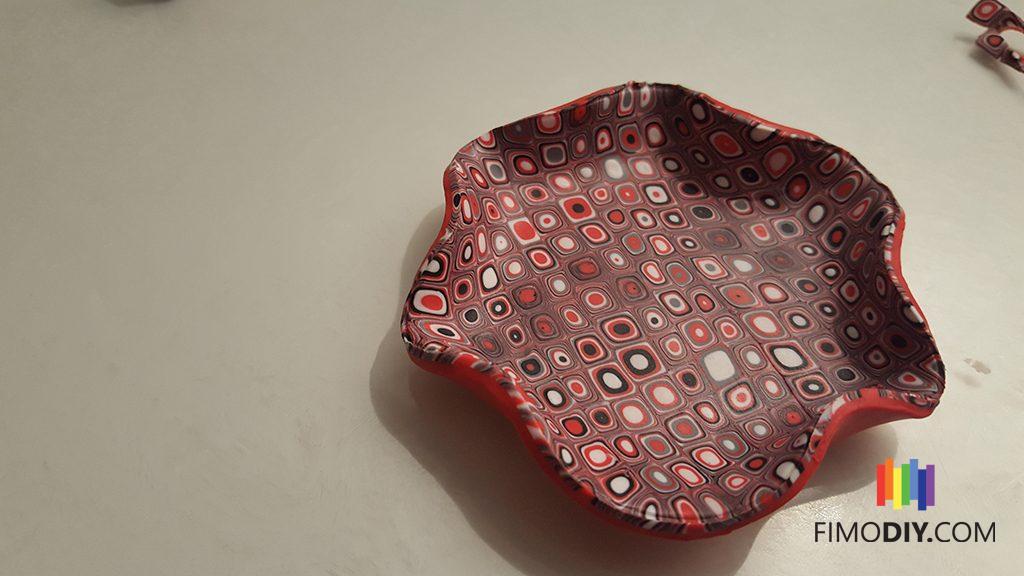
Wait for it, we still have one more step! Use your fingers to raise the edges as shown in the photos below.
This is my polymer clay decorative jewelry dish without the gold edge. For a nicer effect I combined gold powder with liquid fimo and paint the edges of my dish.

You have to decide which one looks better! I prefer gold edges, it looks vintage! After baking I also used a mate varnish.
Bellow you can find a set of photos with different colors of polymer clay decorative jewelry dish I created using this technique I presented here.


I am very curious to find out which you liked the most! Please leave a comment with your favorite for my case study. 80% of my friends have chosen the red one :).
I hope you enjoyed this polymer clay decorative jewelry dish tutorial. I find it beyond stunning! For more polymer clay tutorials click here.
Get captivating polymer clay new ideas and tutorials by following my Pinterest page .
######