Polymer clay princess – DIY step by step tutorial
In a few days is my niece birthday. I wanted so much to make her a special present and after many hours of searching I found a nice tutorial on how to make a princess cake. The nice thing is that you can use it to make a fimo princess and it will last forever. So let’s get started with the DIY fimo princess
Things you need for making a fimo princess:
- fimo white color, pink, purple, brown, peach
- dye in gel brown, black, white
- dye in pearl pink powder and fuchsia
- mold to eject a heart shape
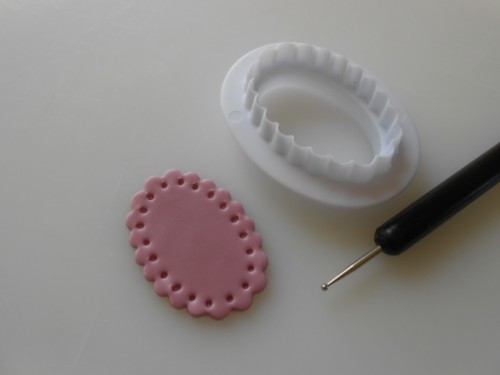
- ball tool
- skewers and toothpicks
- silicone mold to flake
- rubber-tipped tool
- instrument-tipped spoon
- rings round, big and small
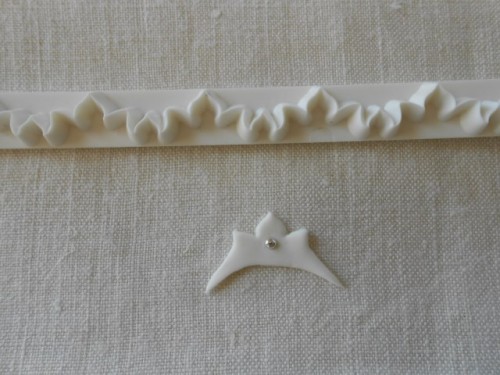
- Trimmer for crown
- Flower mold
- brush with fine tip
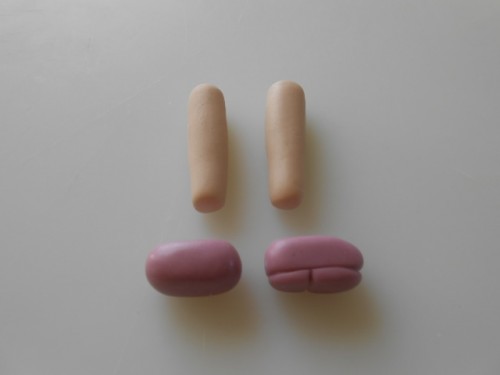
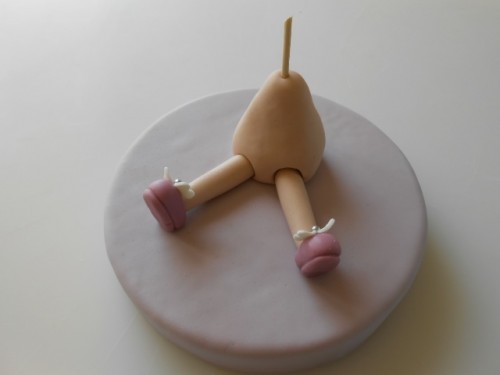
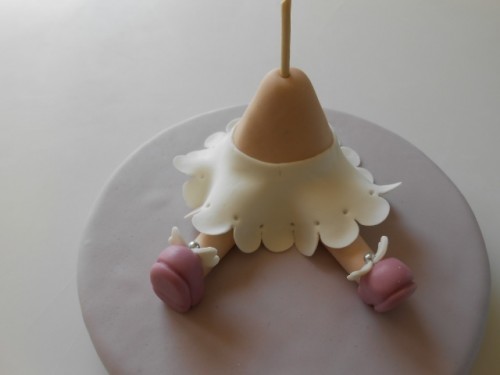
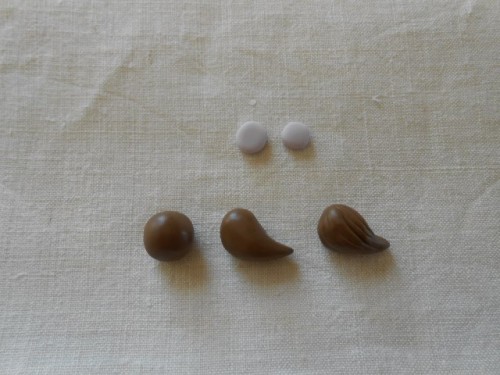
With the fimo flesh-colored create a cone. Use tha ball tool to obtaine the grooves where you place your legs. Prepare two small cylinders for the legs. To carry the shoes, make two pink balls and press them in the middle. Engrave the sole and heel as shown in the photo. With the ball exerted a pressure tool in order to submit his legs. With a mold to eject a heart shape created a bow and finished with a bead silver.

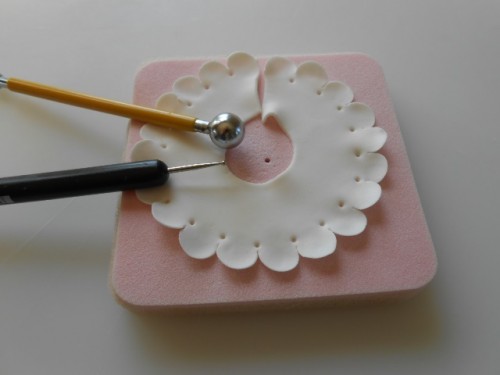
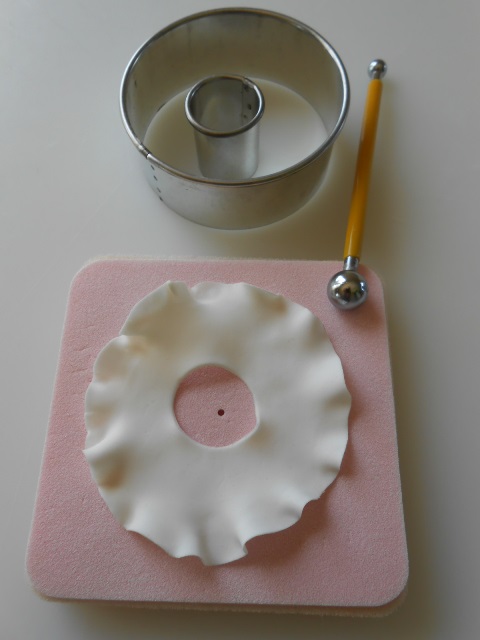
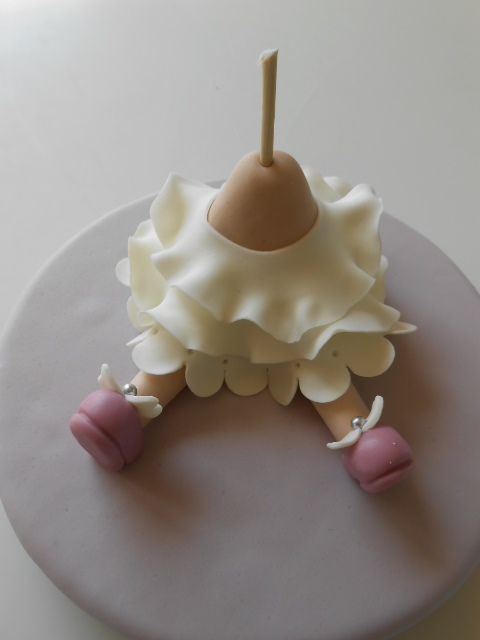
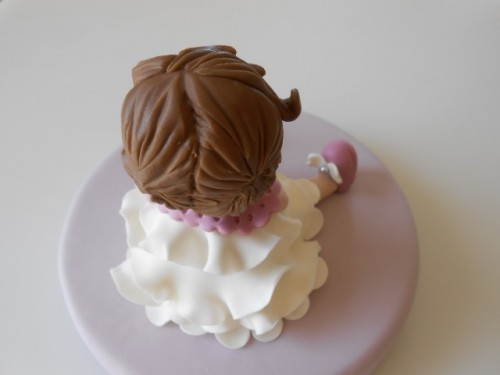
Cover the topper with fimo lilac and insert a toothpick in the center of the body to provide stability. Put then into position then the legs and shoes. With the garret frill prepare the bottom of the dress. Thin the edge with the instrument ball and adorn the lace with some small holes. Apply it on the body.
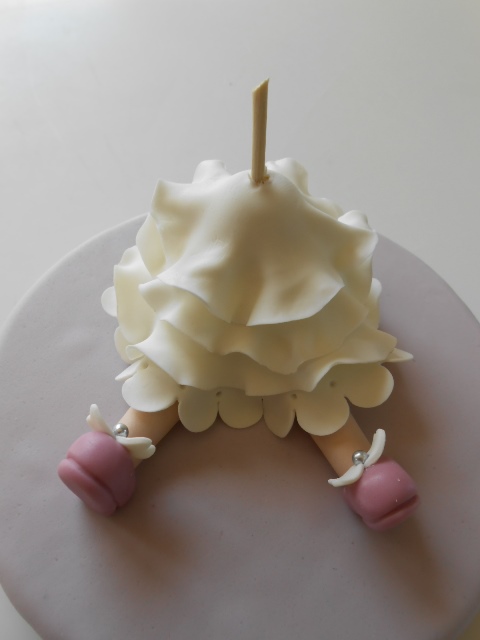
With two round rings, one large and one small, create the other layers of ruffles. Thin the edges with the ball tool and then place them on the body. Cover the body with the last layer apparel.
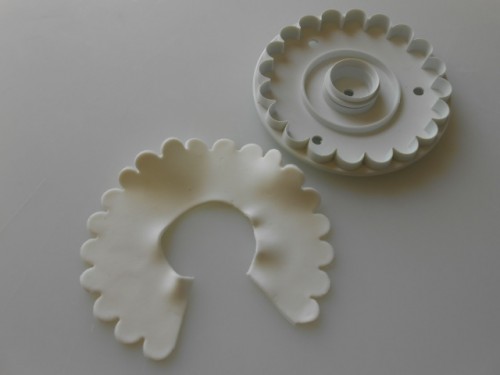
With a wavy oval pastry rings prepared the collar of her dress and fit it on the body.

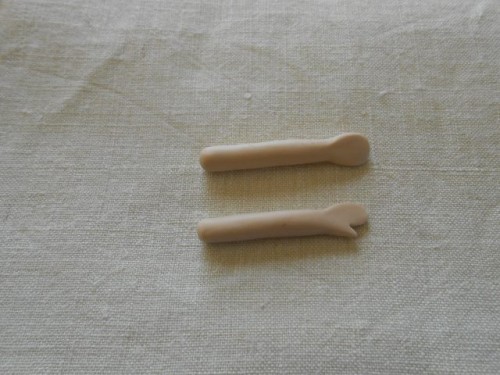
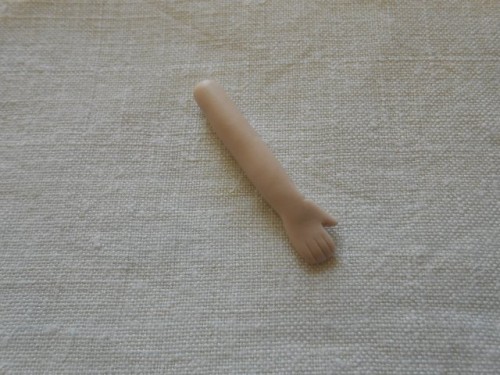
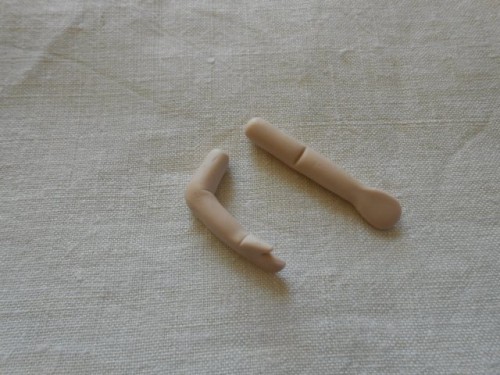
Stretch a piece of flesh-colored fimo. Crush one end and cut a small notch sideways to get the thumb. Mark the fingers of the hand. Take a light sign at the elbow to bend the arm and place it arms on the body.

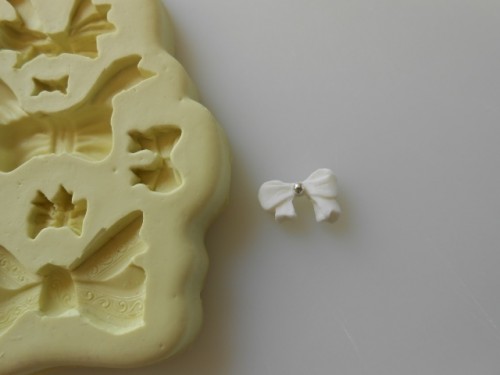
With the help of a silicone mold made a small bow and finish with a silver bead.
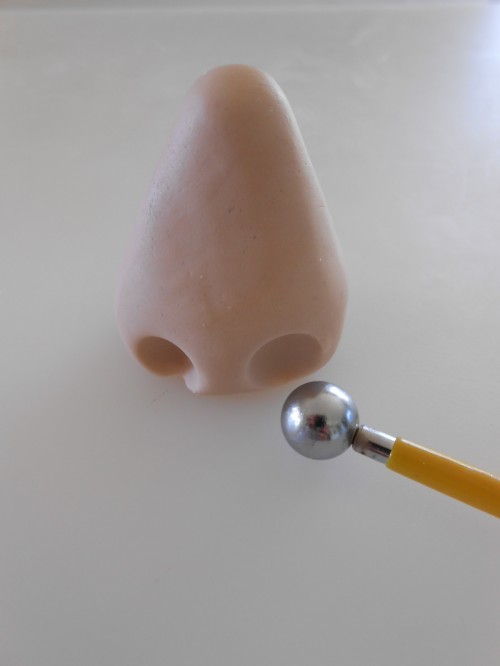
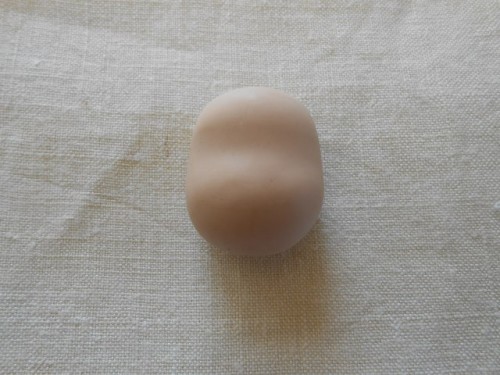
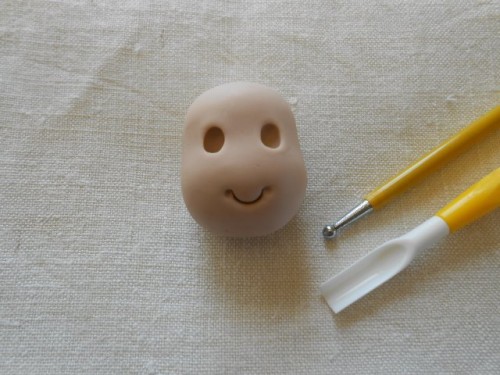
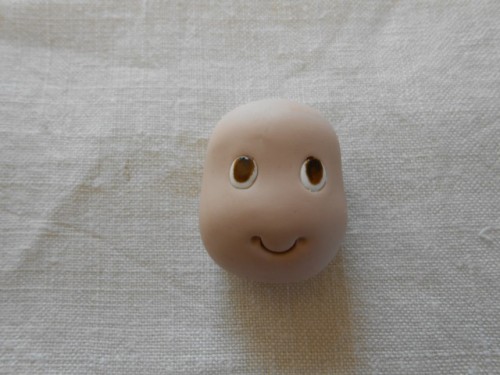
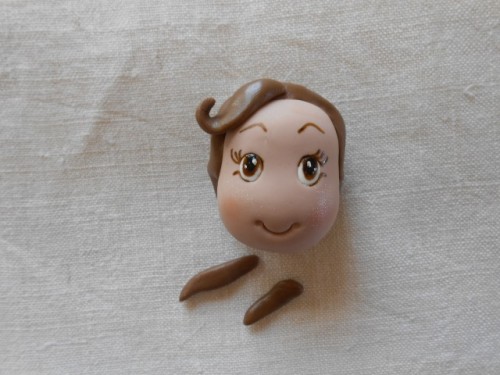
Shape a flesh-colored ball of dough with a little pressure near the center. With the ball toll make the eye and with the appropriate tool mark her mouth. Place the eyes inside the cavities.
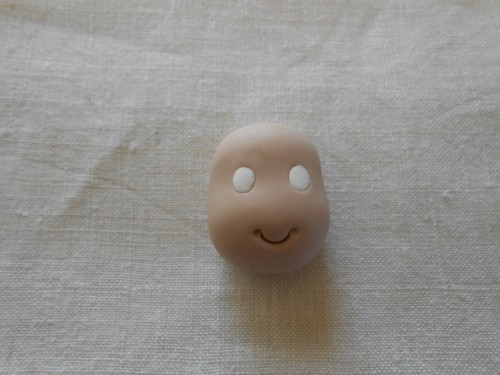
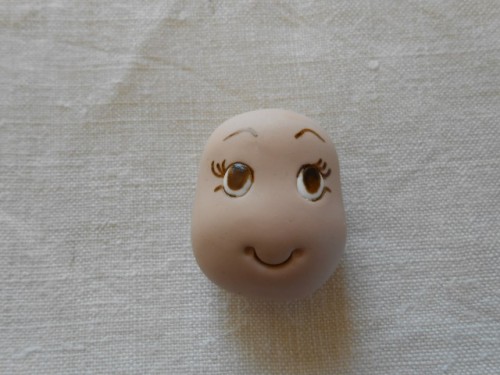
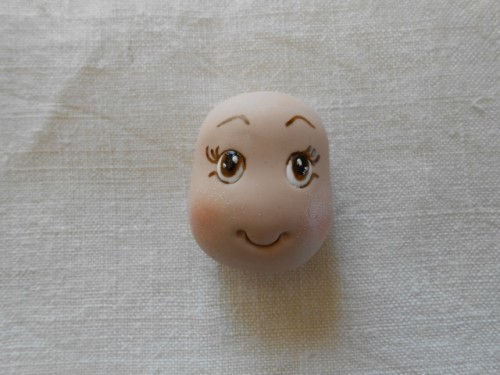
With a fine brush and coloring in brown paint the iris gel and mark the lashes. Finish off your eyes with the white points of light, and with the dye in pearl pink powder, create a gradient on the cheeks.
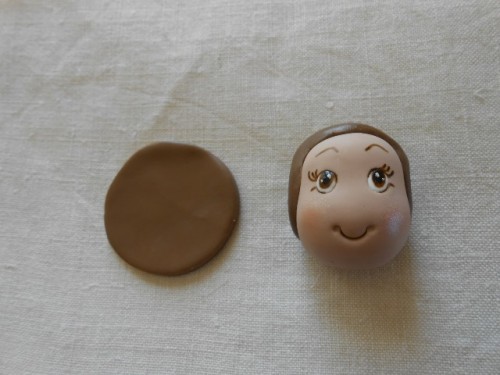
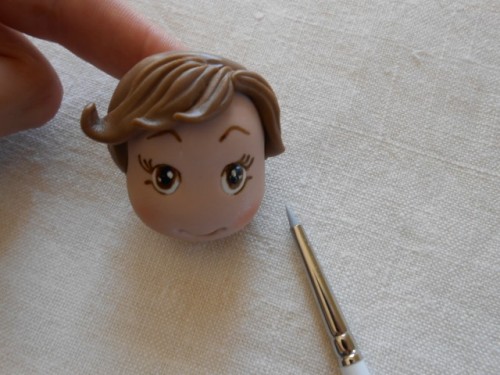
Cover the head with a brown dough circle. Prepare the small sections. With the appropriate tool create modeling of the incisions. Finished the hair from both sides.
Prepare pigtails modeling a brown dough ball-shaped earrings; for elastic create two small circles of lilac color. Place a toothpick at the point where you are going to place the tails. Finish it with two bows.

With a trimmer, prepare the crown and place it on the head and add two sugar pearls for earrings.

Don’t forget to follow my Pinterest page to get updates on free diy fimo tutorials.
source: cake.corriere.it
######