Polymer clay pion shaped rose – DIY step by step tutorial

Polymer polymer clay pion shaped rose tutorial

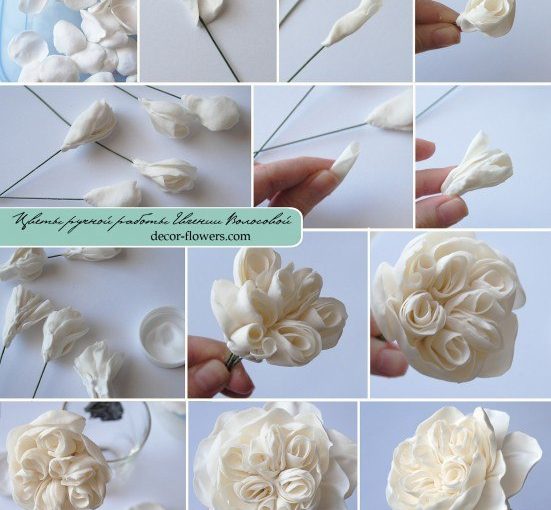
Capture the timeless beauty of a pion-shaped rose with polymer clay. Roses are often associated with love and romance, and their intricate petal arrangements make them a favorite subject for artists and crafters. In this step-by-step tutorial, we will guide you through the process of creating a pion-shaped rose using polymer clay. Let’s dive in and bring the elegance of this classic flower to your crafts! I’ve found this photo tutorial here

Polymer clay pion shaped rose - DIY step by step tutorial

Materials Needed for polymer clay pion shaped rose:

  • Polymer clay in various colors (for petals, center, and leaves)
  • Clay sculpting tools
  • Flower petal cutters or templates
  • Rolling pin
  • Baking tray and oven
  • Varnish or glaze (optional)

Step 1: Conditioning and Shaping the Clay Begin by conditioning the polymer clay, kneading it until it’s soft and pliable. Roll out the clay to a uniform thickness using a rolling pin. Choose the colors you want to use for the petals, center, and leaves.

Step 2: Shaping the Petals Using flower petal cutters or templates, cut out petal shapes from the colored clay. Use clay sculpting tools to add texture and details, such as veins and ruffled edges, to the petals. Repeat this process to create multiple petals in different sizes.

Step 3: Creating the Center Form a small ball or cylinder shape using a contrasting color of clay for the center of the rose. Use your fingers or tools to shape and texture the center, adding depth and realism.

Step 4: Assembling the Rose Start by attaching the smallest petals around the center, slightly overlapping them to create a bud-like appearance. Gradually add larger petals, layering them and positioning them in a spiral pattern. Gently press and blend the clay together to secure the petals.

Step 5: Adding Leaves Roll out green clay and cut out leaf shapes using leaf cutters or templates. Attach the leaves to the stem or base of the rose, positioning them as desired. Use clay tools to create veins and texture on the leaves.

Step 6: Baking and Finishing Carefully transfer the rose onto a baking tray and follow the manufacturer’s instructions for baking. Once the clay has cooled, you can add a layer of varnish or glaze to enhance the shine and protect the finish.

Congratulations! You have successfully created a beautiful polymer clay pion shaped rose. This versatile flower can be used in various craft projects, including jewelry, home decor, and floral arrangements. Experiment with different colors and sizes to create your own unique rose designs. Enjoy the process of working with polymer clay and let your creativity bloom!

Keep in touch for more polymer clay/ fimo ideas and free step by step do it yourself tutorials! Click here for free dyi fimo/polymer clay tutorials and save the link on your bookmarks because you will definitely want to check it frequently for ideas and inspiration.

Until next time I wish you all to be creative! I’m always open to suggestion, please leave a comment. Your opinion is valuable for me.

Don’t forget to follow my Pinterest page. It’s the best way to keep updated with free polymer clay tutorials and clay ideas to increase your creativity.
Polymer clay amazing red flower – DIY step by step tutorial

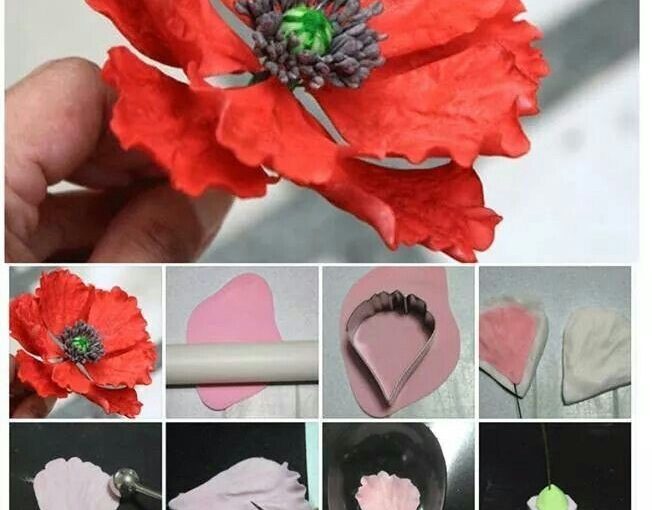
Polymer Clay Amazing Red Flower – DIY Step by Step Tutorial In this tutorial, we will create a stunning red flower using polymer clay. Follow the steps below to make your own beautiful floral piece. I’ve found this amazing photo tutorial over here

Polymer clay amazing red flower - DIY step by step tutorial
  1. Gather your materials:
    • Red, green, black polymer clay
    • Craft knife
    • Rolling pin
    • Flower-shaped cookie cutter
    • Toothpick or needle tool
    • Baking tray and oven
  2. Condition the red polymer clay by kneading it in your hands until it becomes soft and pliable.
  3. Roll out the red clay to a thickness of about 1/8 inch using a rolling pin.
  4. Use the flower-shaped cookie cutter to cut out several petals from the red clay.
  5. Take one petal and gently curve the edges to create a natural shape. Repeat this with all the petals.
  6. Roll a small amount of green clay into a ball and flatten it with a rolling pin. Cut out leaf an * sign using a craft knife add darker green clay on the cuts
  7. For stamens you can use thin wire and add small dots of black clay on the top. Grab them into a bucket.
  8. Arrange the petals in a circular shape around the stamens, slightly overlapping each other to form the flower.
  9. Bake your polymer clay flower following the instructions provided by the manufacturer. Allow it to cool completely.
  10. Once cooled, you can apply a layer of glaze to enhance the shine and protect your creation.
  11. Your amazing red polymer clay flower is now complete! Use it as a decorative element for jewelry, accessories, or home decor.

Keep in touch for more polymer clay/ fimo ideas and free step by step do it yourself tutorials! Click here for free dyi fimo/polymer clay tutorials and save the link on your bookmarks because you will definitely want to check it frequently for ideas and inspiration.

Until next time I wish you all to be creative! I’m always open to suggestion, please leave a comment. Your opinion is valuable for me.

Don’t forget to follow my Pinterest page. It’s the best way to keep updated with free polymer clay tutorials and clay ideas to increase your creativity.

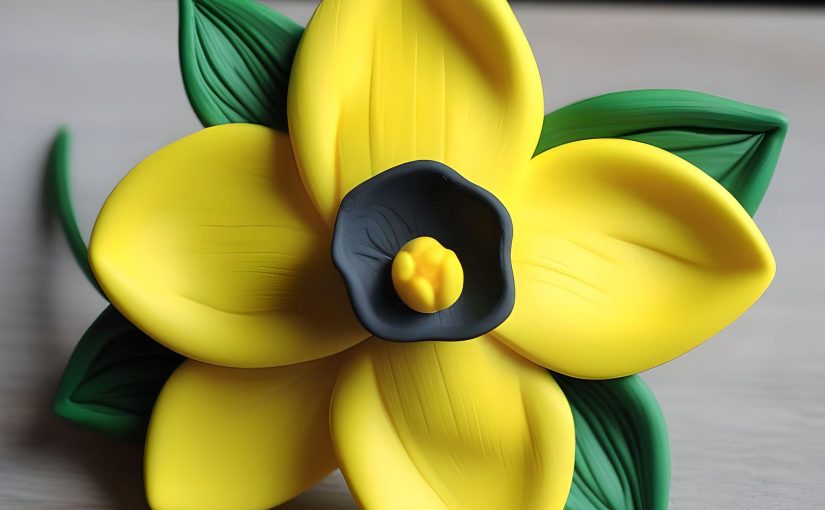
Polymer Clay Daffodils tutorial -DIY step by step flower tutorial

Polymer Clay Daffodils Tutorial – DIY Step by Step Flower

In this polymer clay daffodils tutorial we will learn how to make beautiful flowers using polymer clay. Daffodils are known for their vibrant yellow color and trumpet-shaped blossoms, and with some simple techniques, you can recreate their beauty in clay form. So let’s gather our materials and get started!

I’ve guided myself after a sugar paste tutorial here

Polymer Clay Daffodils tutorial -DIY step by step flower tutorial

Materials Needed for Polymer Clay Daffodils tutorial:

  1. Polymer clay in yellow, green, and white colors
  2. Clay sculpting tools
  3. Rolling pin
  4. Baking tray and oven

Step 1: Conditioning the Clay

Start by conditioning the yellow clay by kneading it in your hands until it becomes soft and pliable. This step ensures that the clay is easy to work with and free of any air bubbles.

Step 2: Shaping the Petals

Roll out a small piece of yellow clay into a thin sheet using a rolling pin. Cut out six petal shapes using a petal-shaped cutter or by hand. Make sure the petals are slightly curved to mimic the natural shape of daffodil petals.

Step 3: Creating the Trumpet

Take a small amount of white clay and roll it into a thin cylinder shape. Flatten one end to create the trumpet shape. Attach the trumpet to the center of the petals, gently pressing and blending them together.

Step 4: Adding Details

Using a clay tool or toothpick, create small lines or grooves on the trumpet to mimic the texture of a daffodil. You can also add tiny yellow clay dots to the center of the trumpet to represent the stamen You can use wire covered in clay or just small amounts of clay shaped as dots. If you use plastic stamens, those will need adding only after the clay is baked.

Step 5: Shaping the Leaves

Take a piece of green clay and roll it into a thin sheet. Cut out two leaf shapes using a leaf-shaped cutter or by hand. Use a clay tool to create veins on the leaves for added realism. This step is optional.

Step 6: Assembling the Flower

Attach the leaves to the back of the flower, positioning them in a way that mimics the natural growth of daffodil leaves. Press and blend them gently to secure them in place.

Step 7: Baking and Finishing the Polymer Clay Daffodils

Place your daffodil flower on a baking tray and follow the instructions on your polymer clay package for baking. Once cooled, you can optionally apply a thin layer of varnish to enhance the shine and durability of the flower.

Polymer Clay Daffodils tutorial -DIY step by step flower tutorial

Conclusion: You have successfully created a beautiful polymer clay daffodil flower! These cheerful flowers are perfect for adding a touch of spring to your crafts and decorations. Feel free to make more daffodils in different sizes and colors to create a vibrant bouquet or use them as embellishments for jewelry, hair accessories, or home decor.

Keep in touch for more polymer clay/ fimo ideas and free step by step do it yourself tutorials! Click here for free dyi fimo/polymer clay tutorials and save the link on your bookmarks because you will definitely want to check it frequently for ideas and inspiration.

Until next time I wish you all to be creative! I’m always open to suggestion, please leave a comment. Your opinion is valuable for me.

Don’t forget to follow my Pinterest page. It’s the best way to keep updated with free polymer clay tutorials and clay ideas to increase your creativity.
DYI polymer clay carnation flower tutorial

It took me long enough, but Oscar de la Renta convinced me to use carnations, those dresses are really beautiful!

Below is a free tutorial on how to make a fimo carnation flower. It’s really simple and easy and you do not have to be experienced in fimo dyi to make this one. I hope you will find this free dyi carnation fimo tutorial  interesting and you will get your answer on how to make fimo carnation. You can find here more fimo diy flower tutorials to help you with your fimo ideas .

Don’t forget to follow my Pinterest page to get updates on free fimo diy tutorials.


For making a polymer clay carnation flower you will need:

  • one color of fimo for the petals: white, pink, red or any other colors you have in mind (if you are an experienced fimo user you can mix the colors for a better product)
  • green fimo
  • a cutter


How it’s made:

  • Firs let’s make a ribbon of fimo

DYI polymer clay carnation flower tutorial

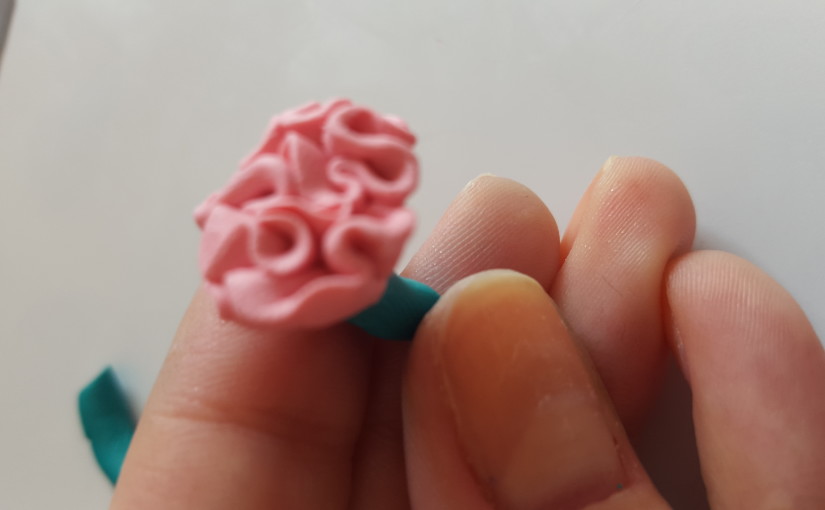
  • Start shriveling one of it’s margins

DYI polymer clay carnation flower tutorial

  • when the wrinkled wide enough packs it into o circle

DYI polymer clay carnation flower tutorial

  • You can repeat the process if you need a flower with a richer crown
  • Make a fimo green sheet and cut a smaller circle out of it

DYI polymer clay carnation flower tutorial

  • Take haf of it and roll it up over flower

DYI polymer clay carnation flower tutorial


You have now your first fimo carnation flower and it looks beautiful! Click here for more free fimo dyi flower tutorials.

I’d love to see your projects and improvements on this tutorial. If you feel like it drop a note and i’ll post your’s too.


DYI polymer clay carnation flower tutorial

DYI polymer clay carnation flower tutorial

DYI polymer clay carnation flower tutorial

So, what you you think about this simple polymer clay carnation flower tutorial? Is this fimo carnation flower beautiful or what?
######

FIMO DIY tutorial earrings – cascade of flowers

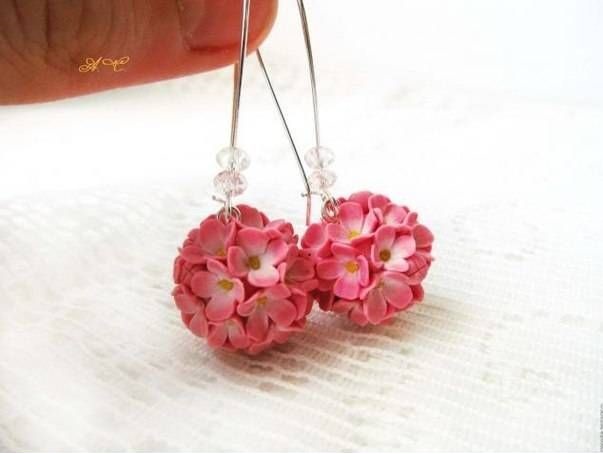
How many times have you walked by a happy lady that had that glamorous thing? And when you came near you realized it wasn’t the shine in her eyes ,it wasn’t the style,  but those perfect earrings? This tutorial will help you have these simple and classic polymer clay cascade of flowers earrings that are perfect with absolutely anything and give you a look of understated sophistication. How many hours did you stand in front of the mirror without any idea what accessories to wear at your first date? I assure you that from now on it will be no time consuming! You’ll have the best accessories to wear at your romantic date! It’s all about selecting something with a unique, yet romantic twist such as flowers!

FIMO DIY tutorial earrings - cascade of flowers

Don’t forget to follow my Pinterest page to get updates on free fimo diy tutorial


Things you need for this beautiful fimo earrings:

– one pair of ear wire

-three packs of fimo: white, yellow, pink

-one link

-fimo glue

and some motivation, because the best way to success is to persevere.


Let dreams came true:

Grab two piece of fimo (one pink and one white), press it and put them one over the other as shown in the figure. Now you have to press them again and then roll up the piece into a cylinder

.FIMO DIY tutorial earrings - cascade of flowers

On the next step you will have to cut the cylinder into thin pieces, those will be the flower petals. Don’t worry if you cannot cut it into equal pieces, you’ll adjust them on the run.

Grab now a little bit of yellow fimo, blend it with your fingers until is really thin. Put it with care on the work surface and cut it into pieces. Take piece by piece and make small balls. Those will be put in the middle of the flowers. Spread  them from the work surface, you’ll only need them at the end.

FIMO DIY tutorial earrings - cascade of flowers


Let’s come back at the pink pieces! Grab one piece and make a drop. Cut it in a “+” and spread a little bit the pieces. If you don’t have a special tool for this you can use a toothpick, a piece of wire or even a needle! Press them until you obtain the flower. Take one yellow ball and push it in the middle of the flower. Cut the excess of the fimo (the strain of the flower), but be aware not to destroy anything.

FIMO DIY tutorial earrings - cascade of flowers

Now you deserve congratulations, you’ve just created your own flower. Put yourself on repeat and make some more! They say that repetition is the mother of skill. If the first flower doesn’t look good don’t give up you have plenty of time to improve!

FIMO DIY tutorial earrings - cascade of flowers

You already passed halfway through. Grab another two equal pieces of pink fimo and blend it until you get balls. Cover them with glue and carefully place them flowers. When all the ball is covered stick the link and go “cook” them! After they have cooled make add them ear wires. The rest is all about the attitude!

FIMO DIY tutorial earrings - cascade of flowers

I wish you all to have a special date! Don’t forget that with greater risk comes greater happiness: the more you are able to surprise the boy on the first date, the stronger your relation with him will be!

Congrats bijouxcherie! This is the best to wear on a first date! The article is in French but is “délicieux”!

For more polymer clay/ fimo earrings tutorial click here

What do you think? Aren’t this polymer clay cascade of flowers earrings just perfect?
######