Polymer clay mokume gane cane – DIY step by step tutorial
We continue the series of tutorial with a polymer clay mokume gane cane. This is not a new technique, but one with unlimited options. I hope that you’ll learn something useful for yourself and for your jewelry.
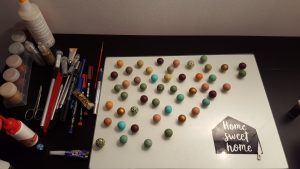
For these tutorial you will need the next products in the photo. If you are not a beginner and you have a pasta machine, I recommend you to use it when creating thin sheets.
Tools you’ll need:
– few colors of polymer clay
– cutter
– rolling pin
– toothpicks
– molds
– pasta machine (optional)
First of all, we’ll create polymeric clay thin layers, one of every stack of each other. We’ll obtain a pile of multi-colored layers. To make the layers thinner, pressed them with the rolling pin, then cut them into half and put them one over another and repeat the process until eventually the layer are of the desired thickness. The thinner the layers, the more beautiful it will turn out.
Make through holes and cuts. I use the tools for this: an old pen, a toothpick, a curved metal strip. Large holes fill with scraps of polymer clay. For advanced pattern of polymer clay mokume gane cane you can use gradient sheets or silver / gold leaf.
After cutting the shapes , you will need to squeeze the block, removing excess of air, trimming it with your fingers. The smaller it becomes, the more complex pattern will be. To use it you will need to cut thin layers with a sharp knife and apply it on a one color sheet (for a better use of the cane).
Cut the shape you want through the sheet. You can use molds or you can drew a shape and cut out a paper and then with the cutter just follow the edges of the work-piece. Do not forget to turn the work-piece because the earrings should be symmetrical.
If you’ll create earrings, don’t forget to make hols before baking. This is how the sheets look after baking.
Below is a photo of a the polymer clay pair of earrings made from this cane. Aren’t they pretty?
This was a free tutorial added by . Hope you learned something new and that we’ll find each-other soon on this site.
Hope you enjoyed this polymer clay mokume gane cane tutorial. If you decide to try it I would love to see the color combinations you tried. Fell free to comment and if you want to share your work please contact me.
If you are interested in polymer clay tutorials, you can find a list over here.
To share on pinterest please use this photo:
Keep yourself updated with new polymer clay ideas and free tutorials by following my Pinterest page .
######


