Polymer Clay Daffodils tutorial -DIY step by step flower tutorial
Polymer Clay Daffodils Tutorial – DIY Step by Step Flower
In this polymer clay daffodils tutorial we will learn how to make beautiful flowers using polymer clay. Daffodils are known for their vibrant yellow color and trumpet-shaped blossoms, and with some simple techniques, you can recreate their beauty in clay form. So let’s gather our materials and get started!
I’ve guided myself after a sugar paste tutorial here
Step 1
Materials Needed for Polymer Clay Daffodils tutorial:
- Polymer clay in yellow, green, and white colors
- Clay sculpting tools
- Rolling pin
- Baking tray and oven
Step 1: Conditioning the Clay
Start by conditioning the yellow clay by kneading it in your hands until it becomes soft and pliable. This step ensures that the clay is easy to work with and free of any air bubbles.
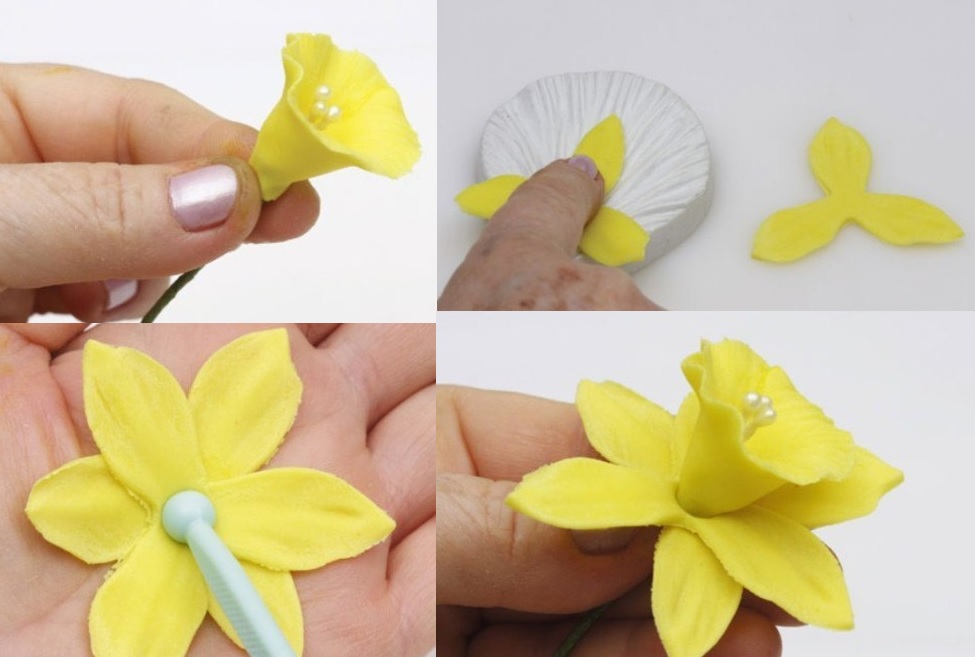
Step 2: Shaping the Petals
Roll out a small piece of yellow clay into a thin sheet using a rolling pin. Cut out six petal shapes using a petal-shaped cutter or by hand. Make sure the petals are slightly curved to mimic the natural shape of daffodil petals.
Step 3: Creating the Trumpet
Take a small amount of white clay and roll it into a thin cylinder shape. Flatten one end to create the trumpet shape. Attach the trumpet to the center of the petals, gently pressing and blending them together.
Step 4: Adding Details
Using a clay tool or toothpick, create small lines or grooves on the trumpet to mimic the texture of a daffodil. You can also add tiny yellow clay dots to the center of the trumpet to represent the stamen You can use wire covered in clay or just small amounts of clay shaped as dots. If you use plastic stamens, those will need adding only after the clay is baked.
Step 5: Shaping the Leaves
Take a piece of green clay and roll it into a thin sheet. Cut out two leaf shapes using a leaf-shaped cutter or by hand. Use a clay tool to create veins on the leaves for added realism. This step is optional.
Step 6: Assembling the Flower
Attach the leaves to the back of the flower, positioning them in a way that mimics the natural growth of daffodil leaves. Press and blend them gently to secure them in place.
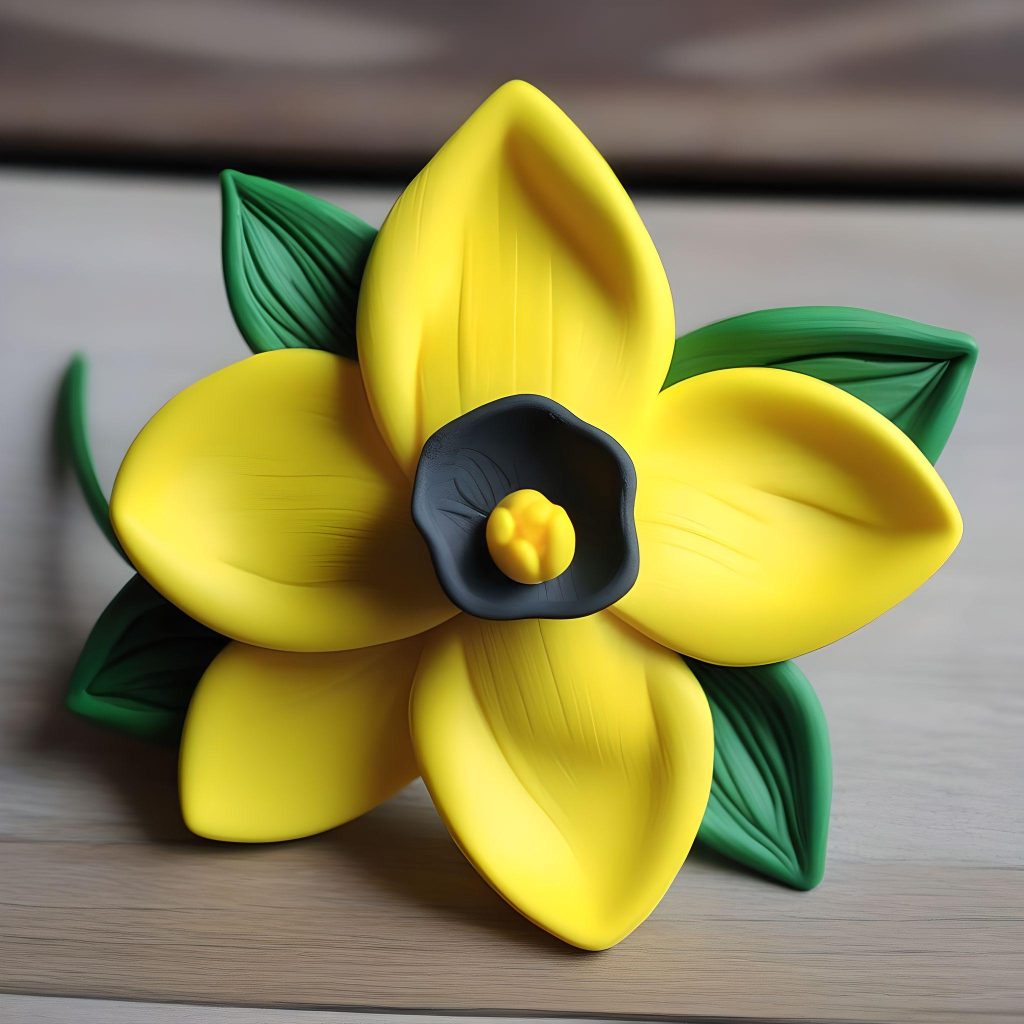
Step 7: Baking and Finishing the Polymer Clay Daffodils
Place your daffodil flower on a baking tray and follow the instructions on your polymer clay package for baking. Once cooled, you can optionally apply a thin layer of varnish to enhance the shine and durability of the flower.
Step 2
Step 3
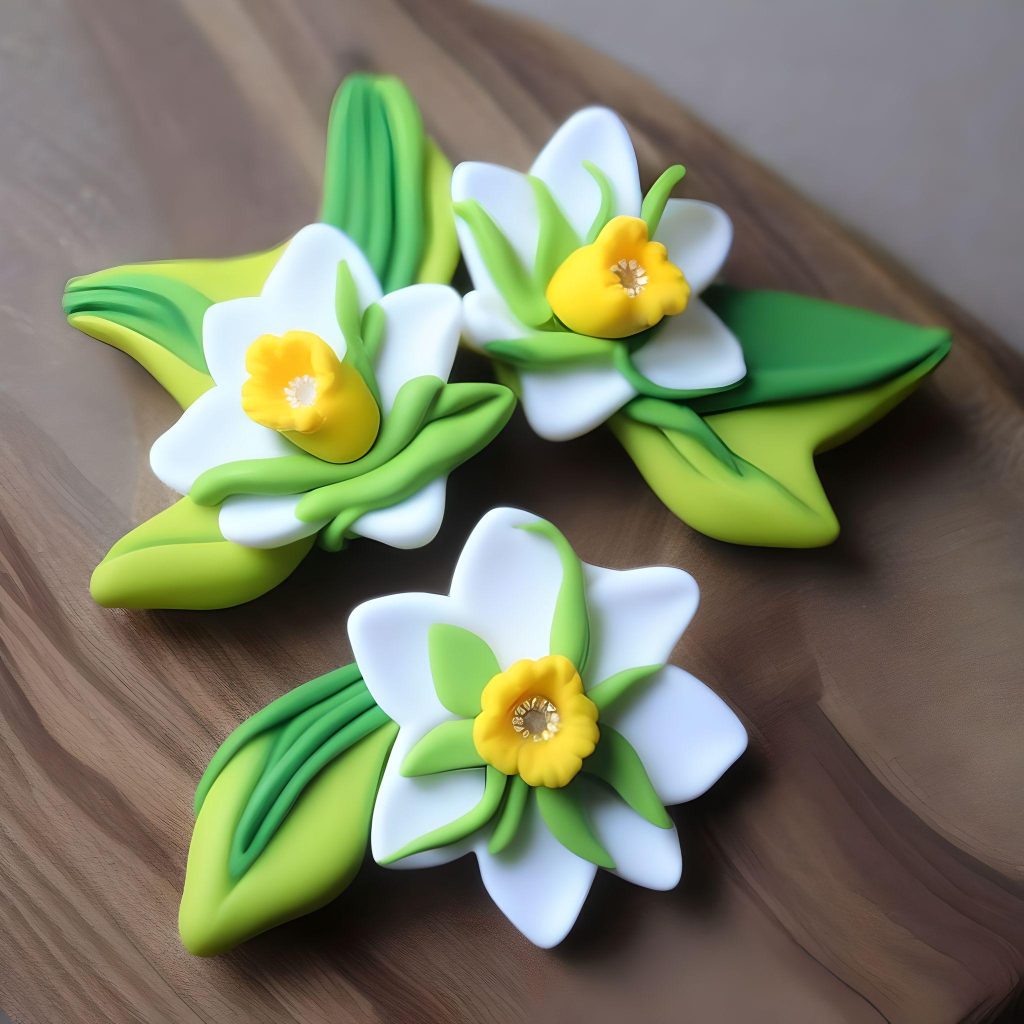
Conclusion: You have successfully created a beautiful polymer clay daffodil flower! These cheerful flowers are perfect for adding a touch of spring to your crafts and decorations. Feel free to make more daffodils in different sizes and colors to create a vibrant bouquet or use them as embellishments for jewelry, hair accessories, or home decor.
Keep in touch for more polymer clay/ fimo ideas and free step by step do it yourself tutorials! Click here for free dyi fimo/polymer clay tutorials and save the link on your bookmarks because you will definitely want to check it frequently for ideas and inspiration.
Until next time I wish you all to be creative! I’m always open to suggestion, please leave a comment. Your opinion is valuable for me.
Don’t forget to follow my Pinterest page. It’s the best way to keep updated with free polymer clay tutorials and clay ideas to increase your creativity.